Managers have full control over managing registered users and you have the power to add and remove users from your company and projects.
There are three methods for adding users to a Brainstork project, granting them access to view the project's sessions.
1. Adding New Users to the Company
2. Adding Existing Users to the Projects
3. Inviting New Users to the Projects
You can find the option to resend the registration link at the end of this article.
Additionally, you can refer to these articles for instructions on changing user roles and removing users.
Adding New Users to the Company:
Managers can add a user to multiple projects by first adding them to the company. Then, managers can easily add them to each project
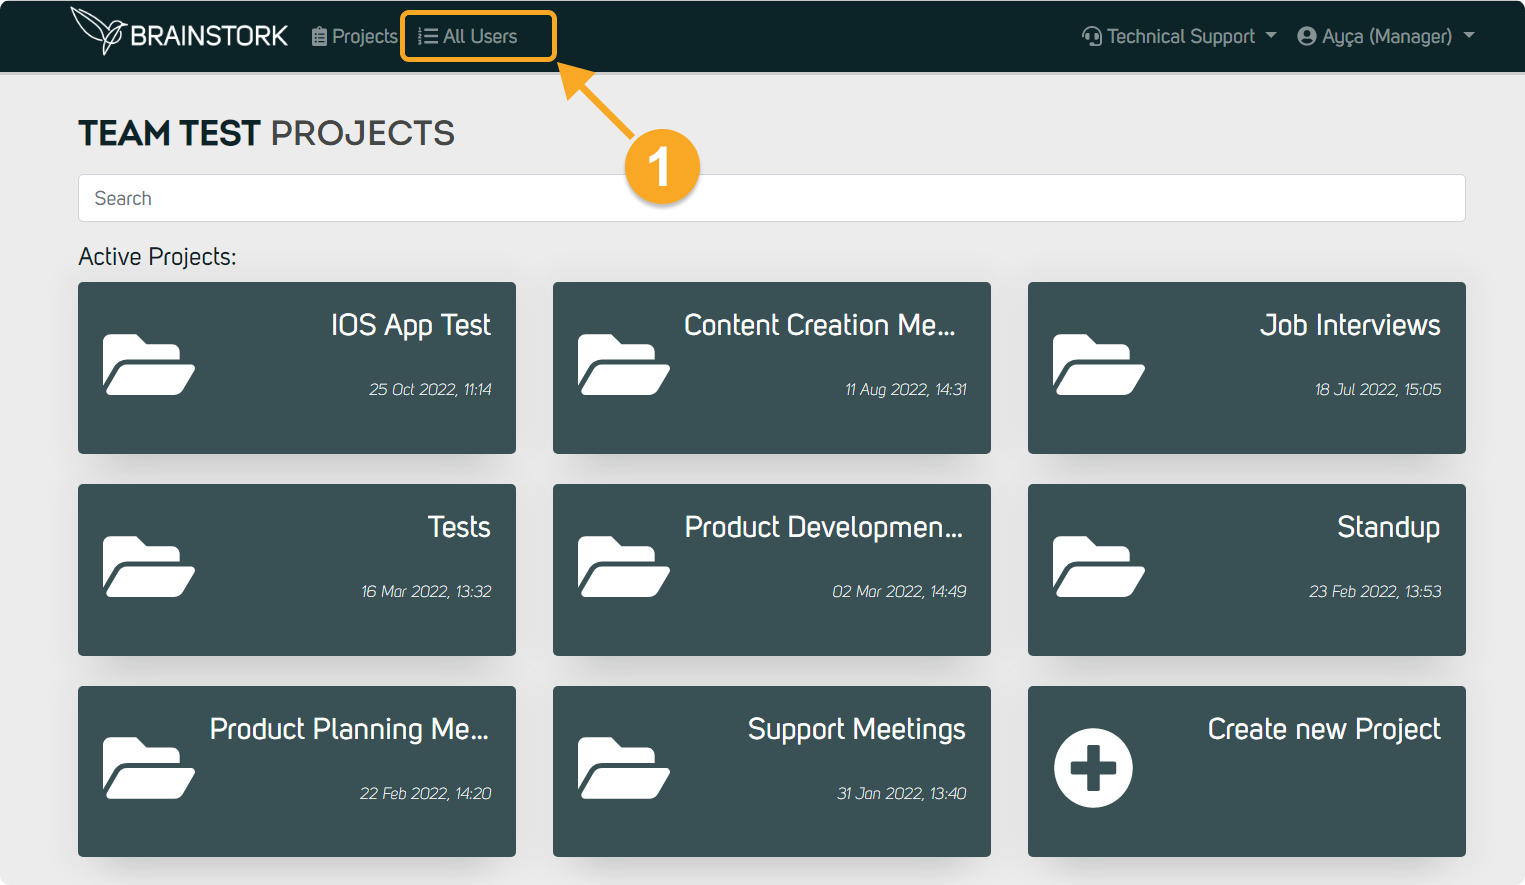
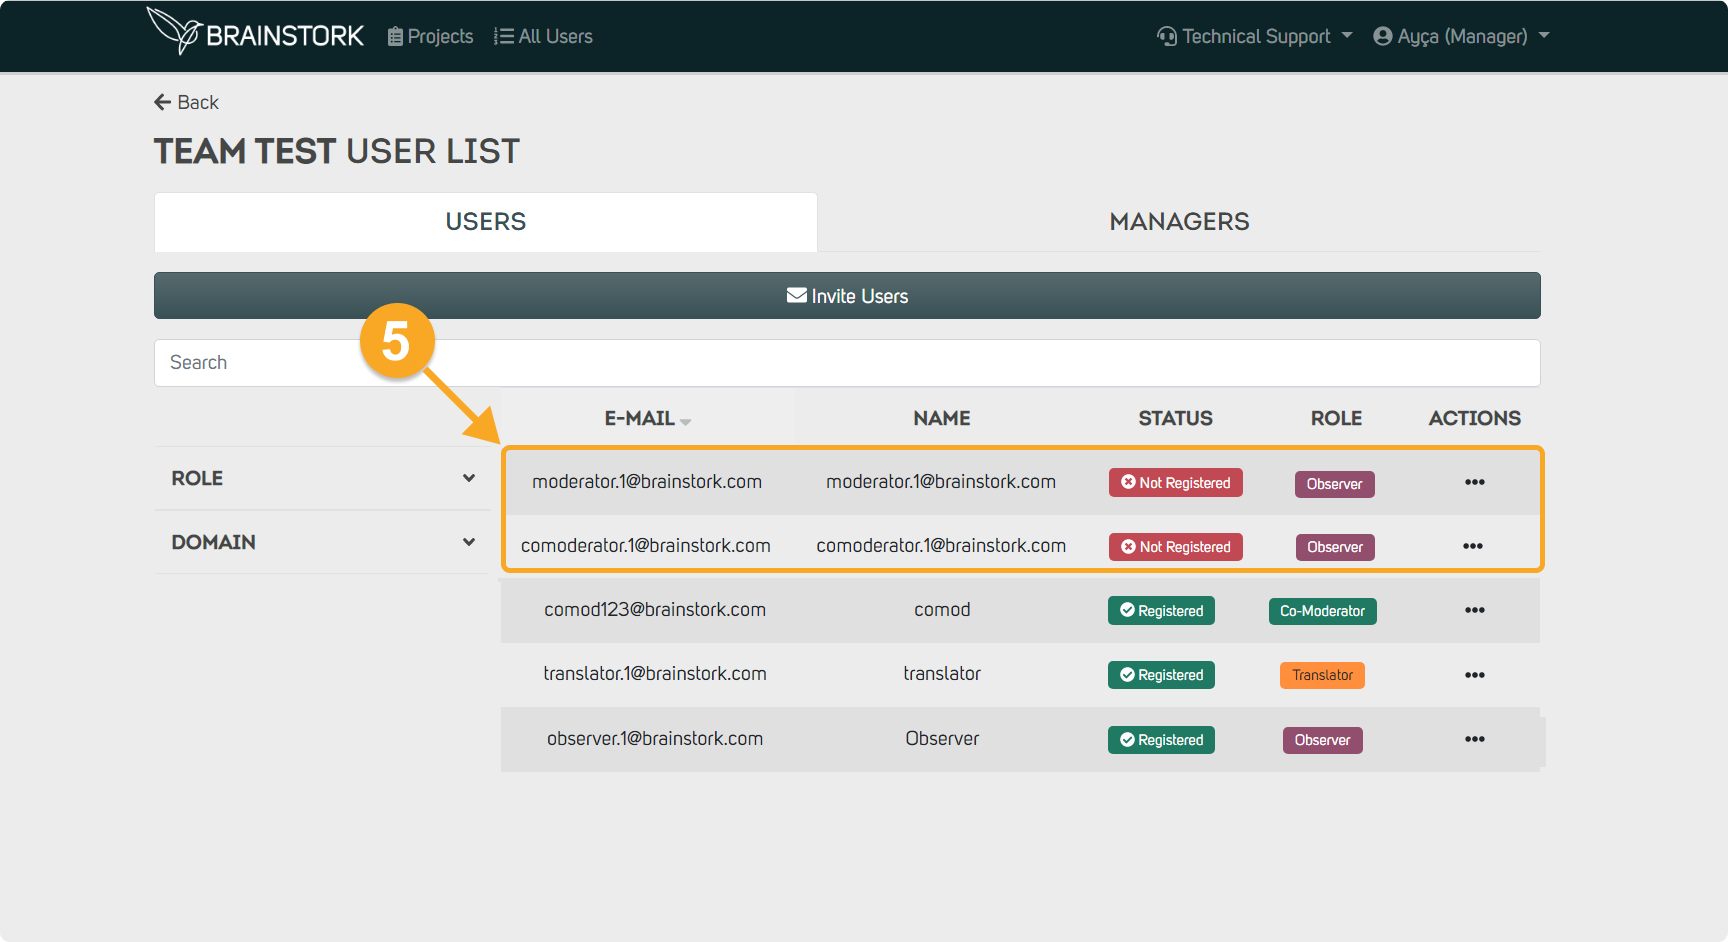
1. Go to the "All Users" page in the top left corner of the screen.
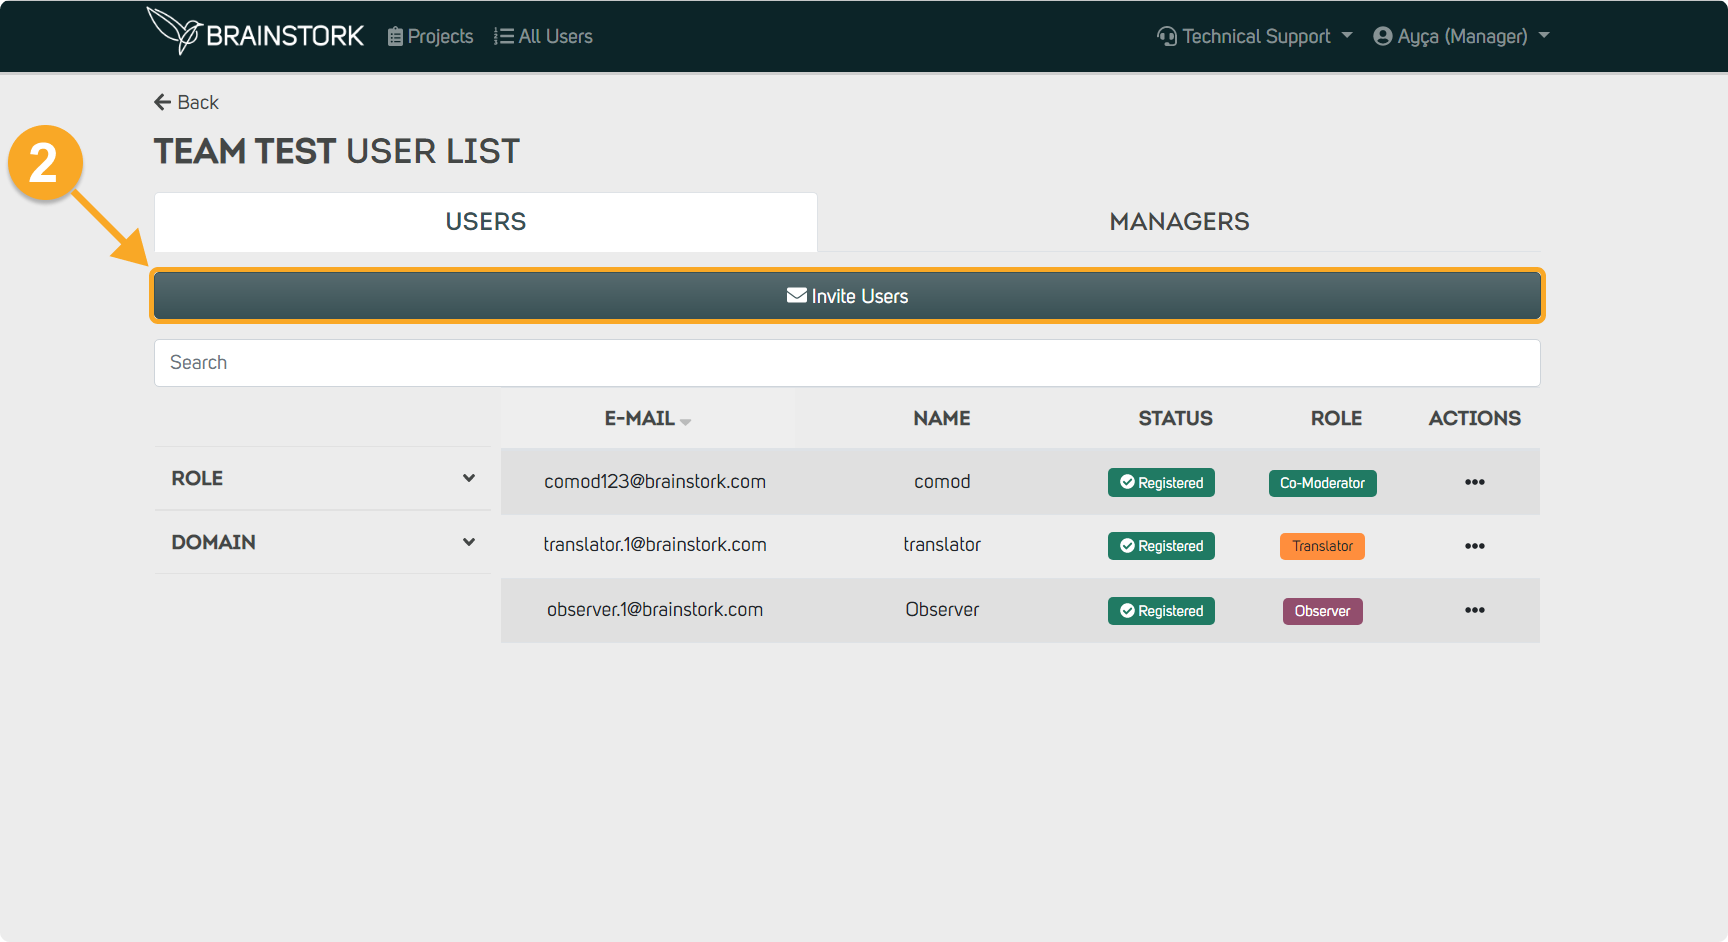
2. Click the "Invite Users" button.
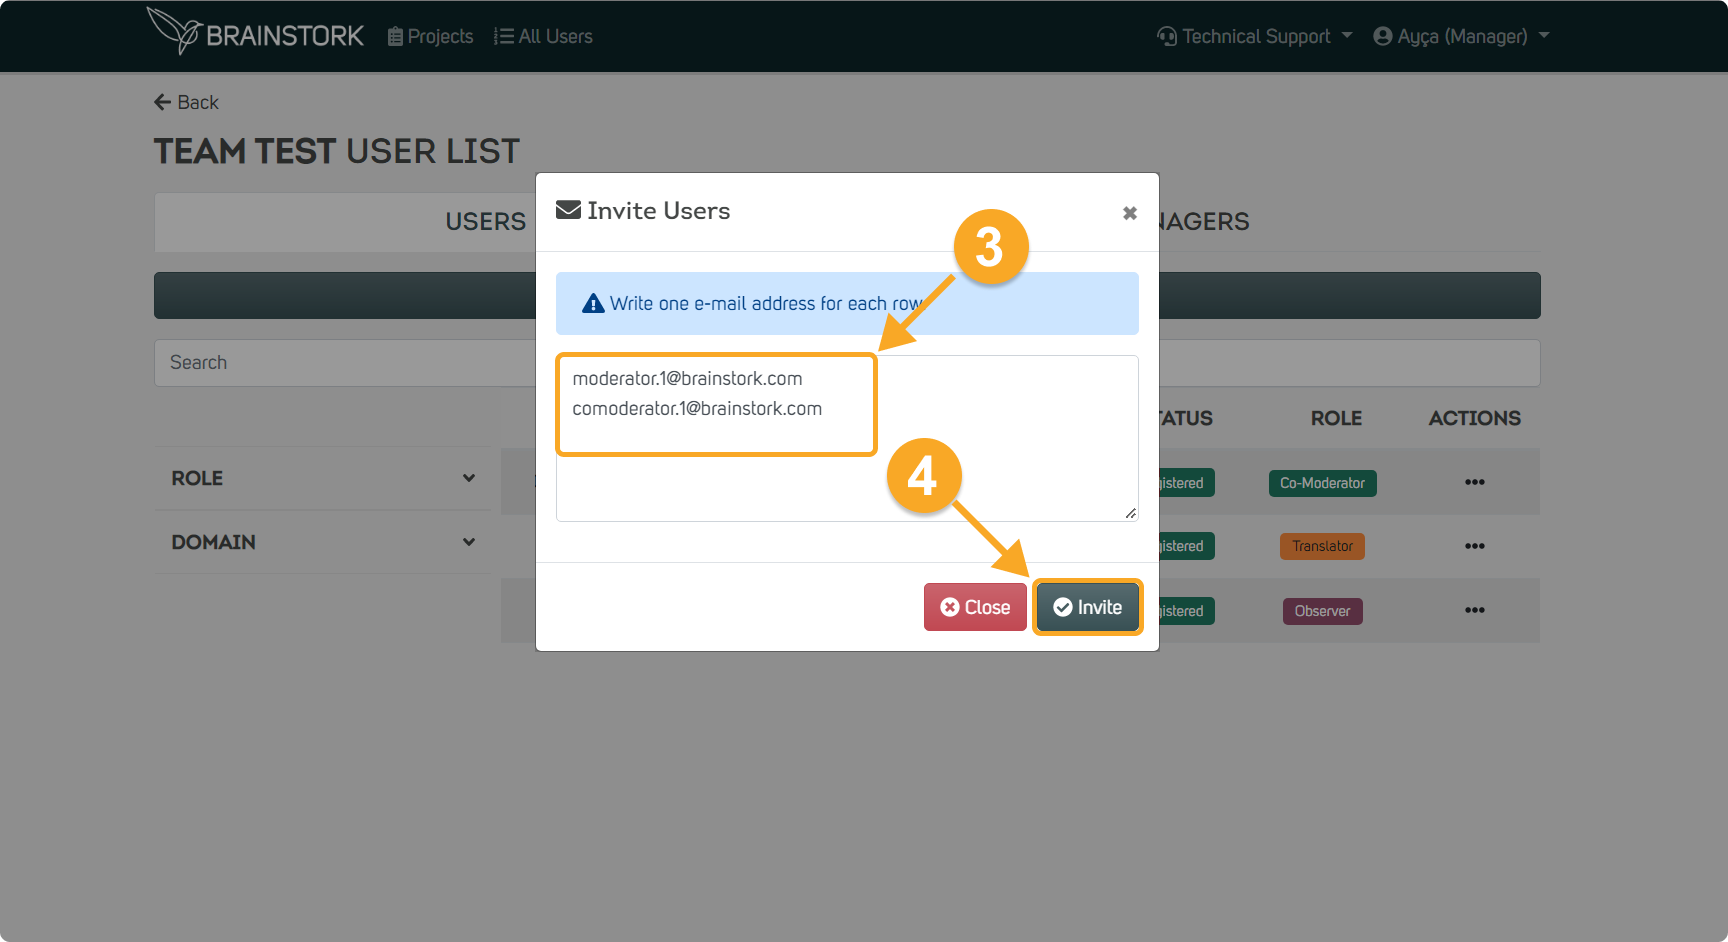
3. Write the email addresses of the users you wish to invite.
4. Click the "Invite" button.
5. You will now see the status of these emails as "not registered" and "observer." Learn how to change their roles by checking out this article.
Adding Existing Users to the Projects
Adding a new user to a project, who has either been recently added to the company or already completed registration for another project, is simple.
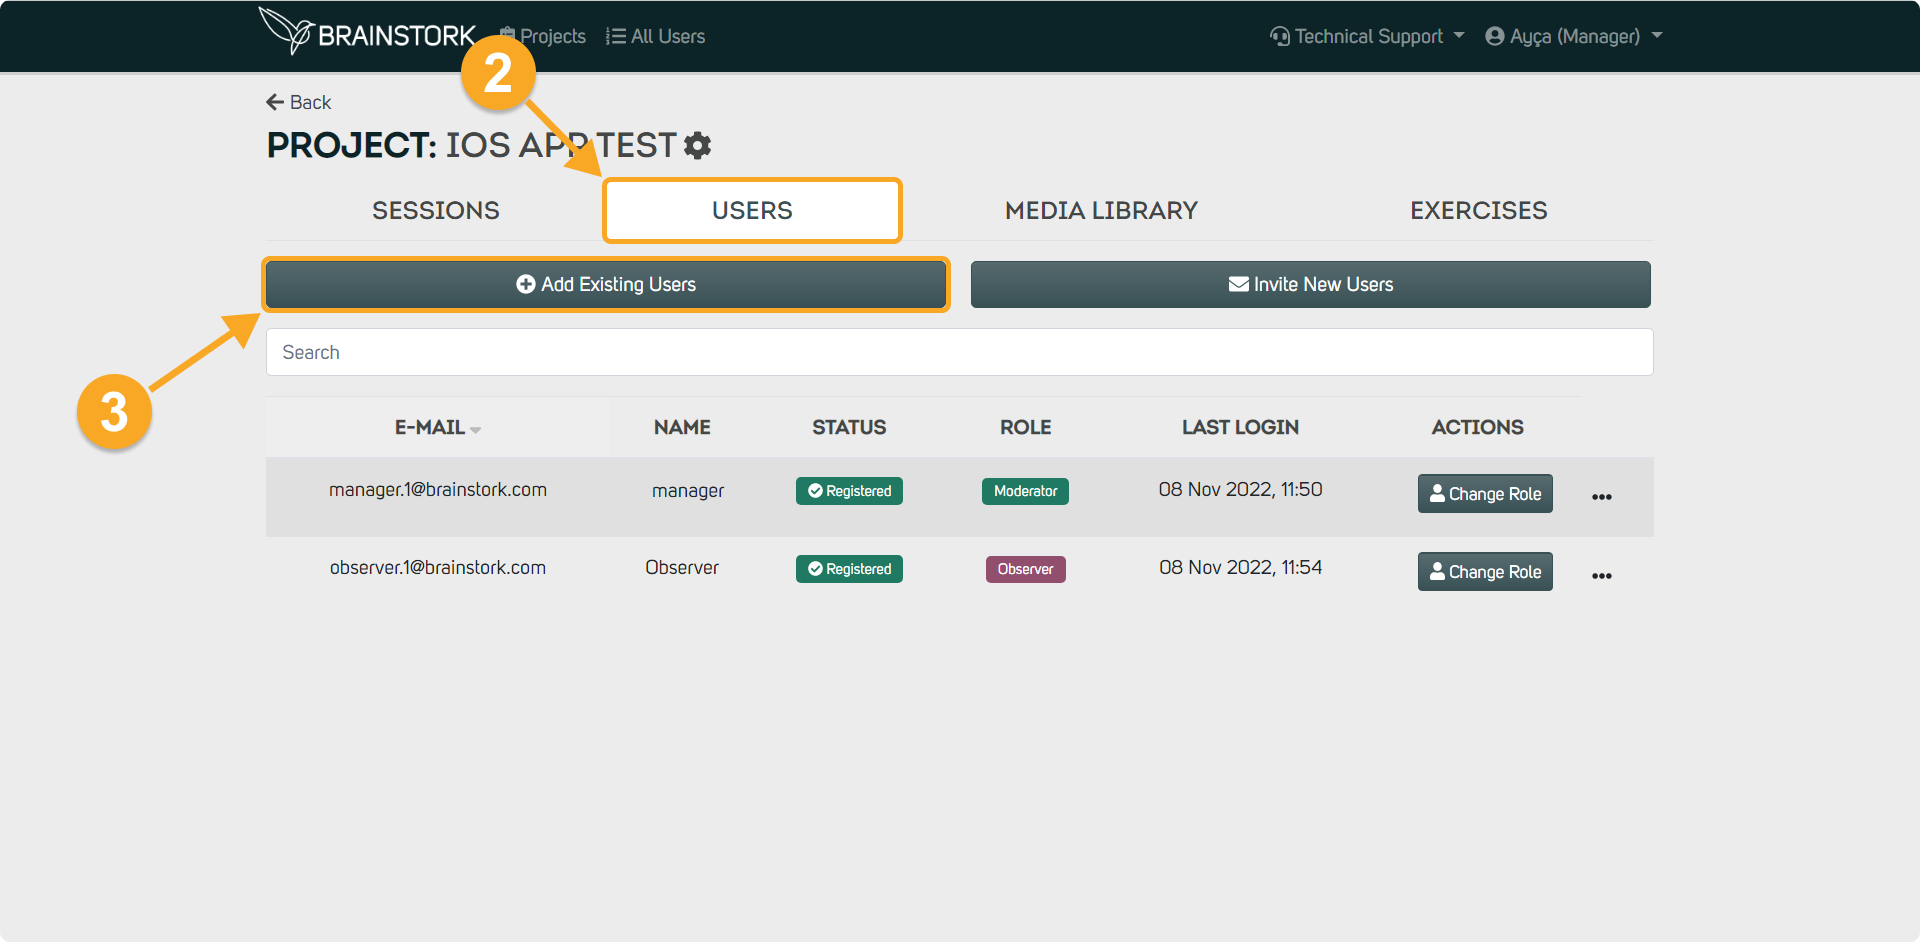
1. Open the desired project.

2. Click the "Users" tab.
3. Click the "Add Existing Users" button.
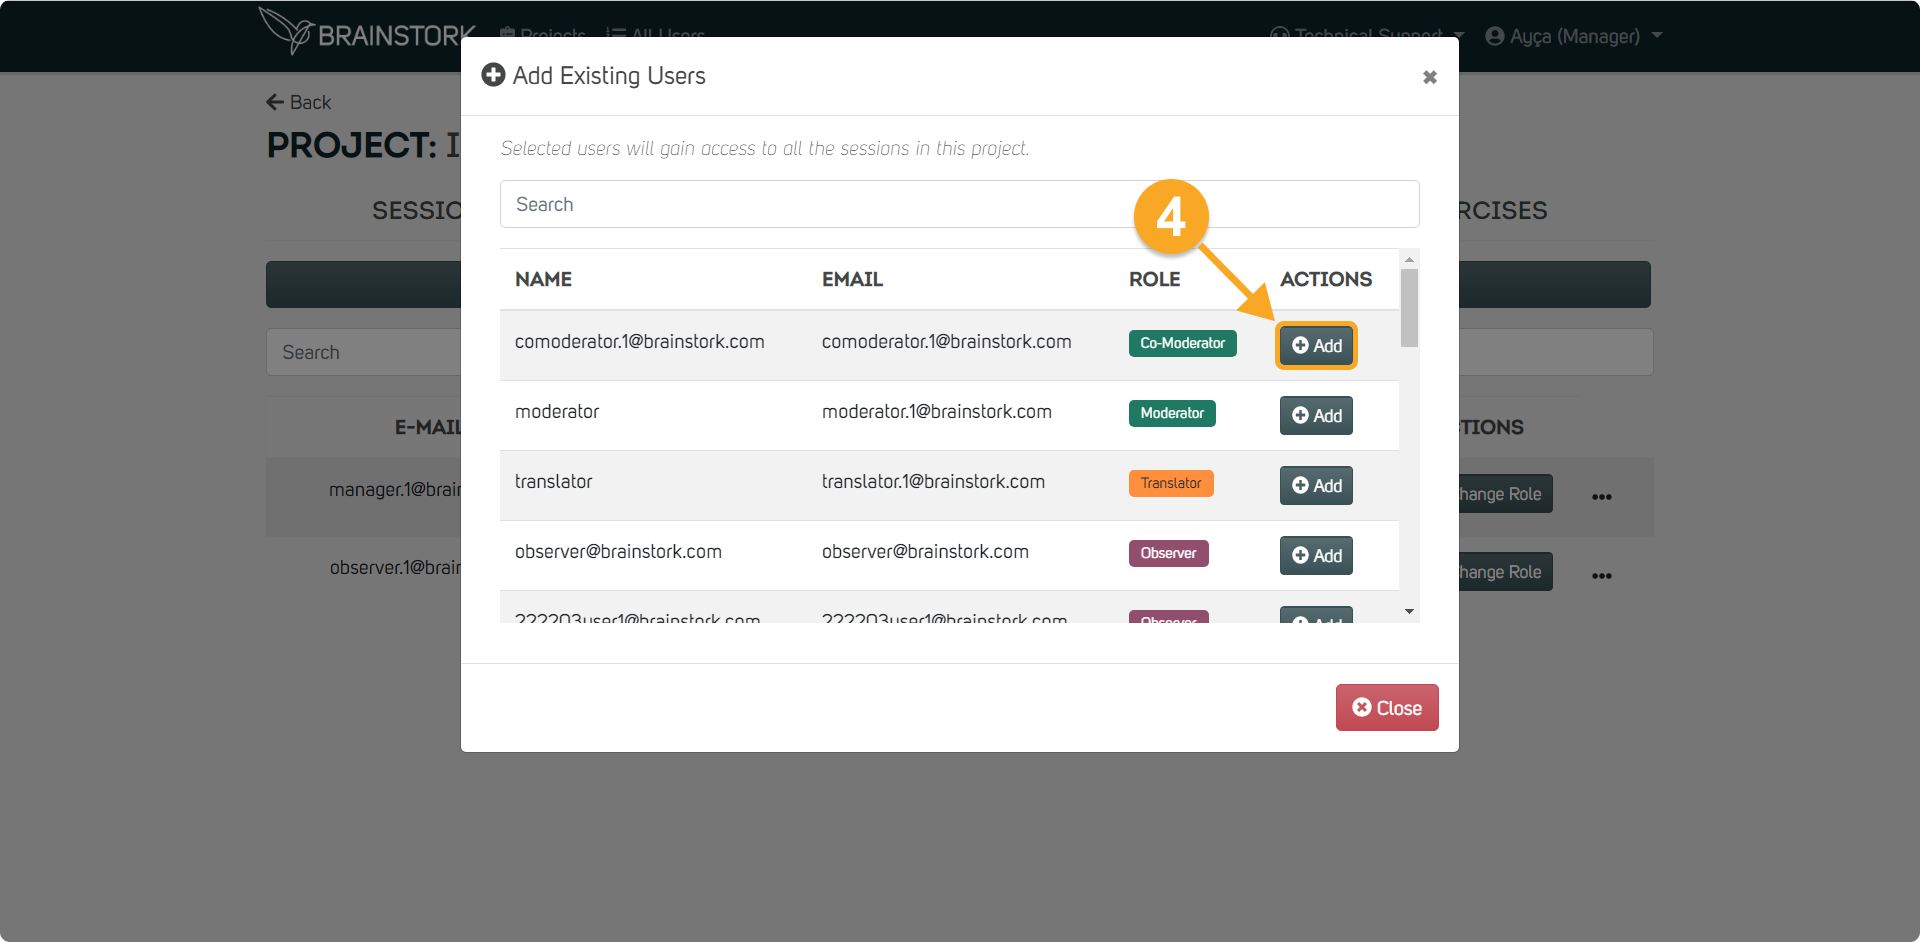
4. Click "Add" next to the desired user's name.
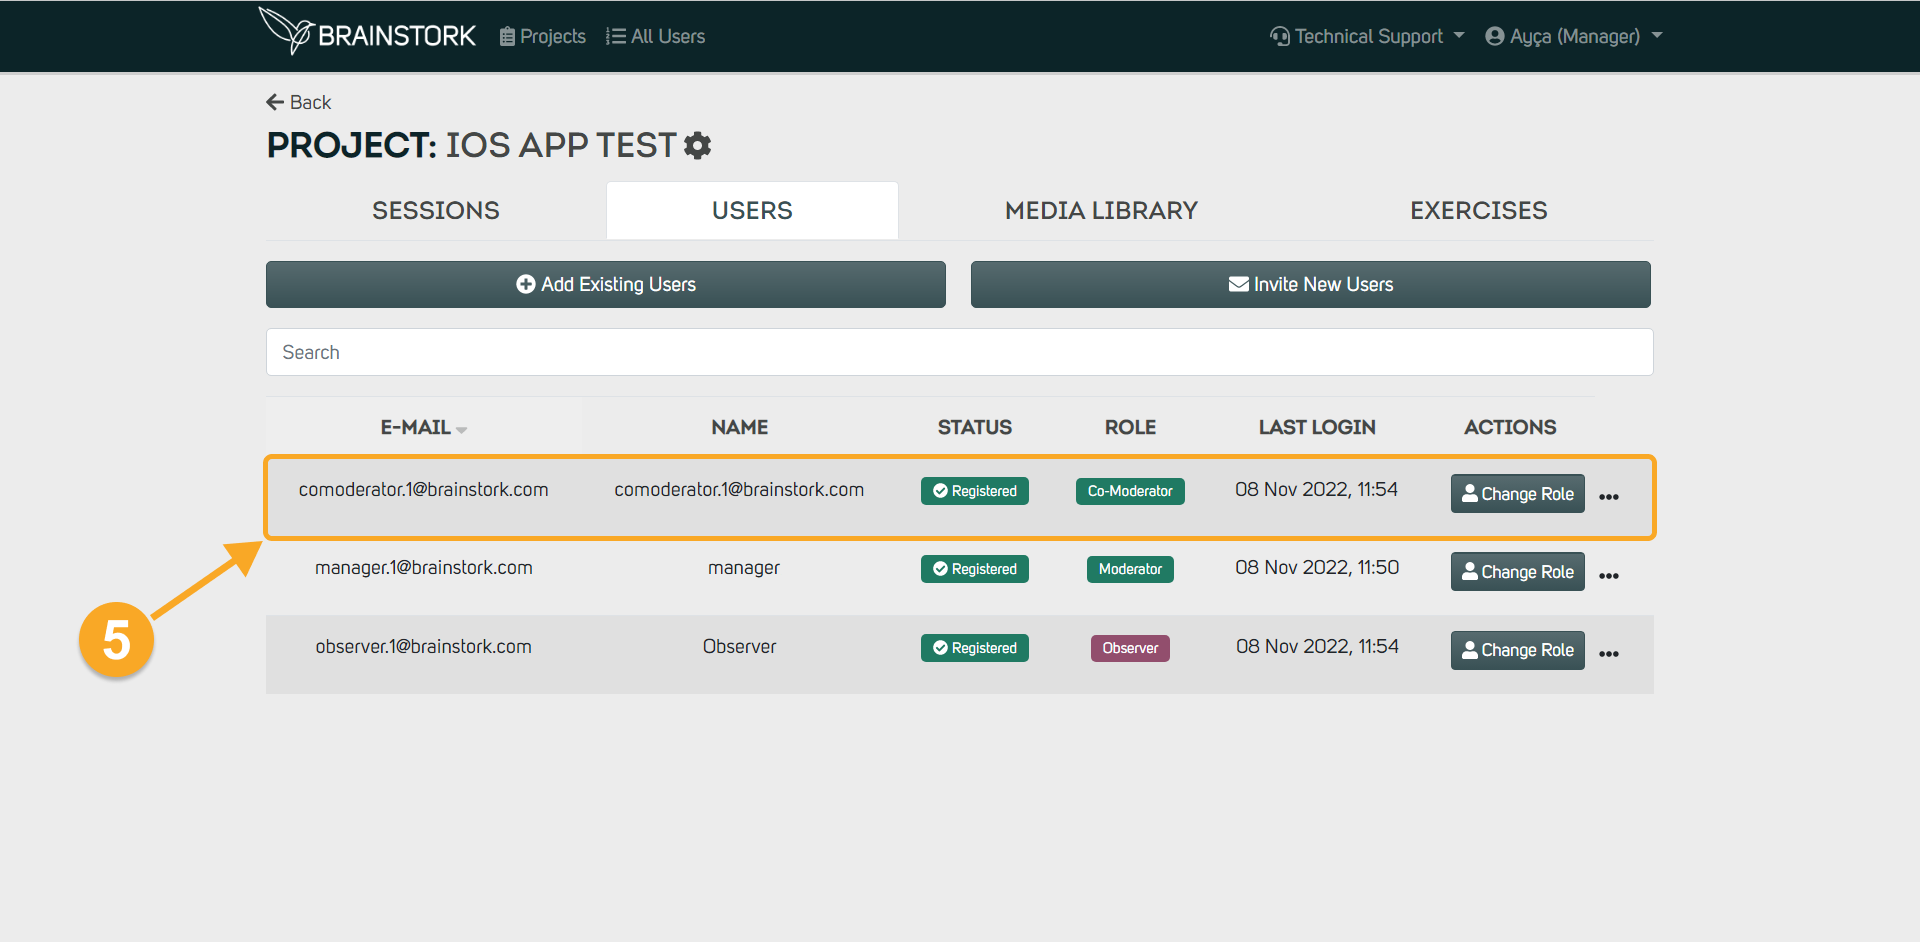
5. Now, the user has access to this project.
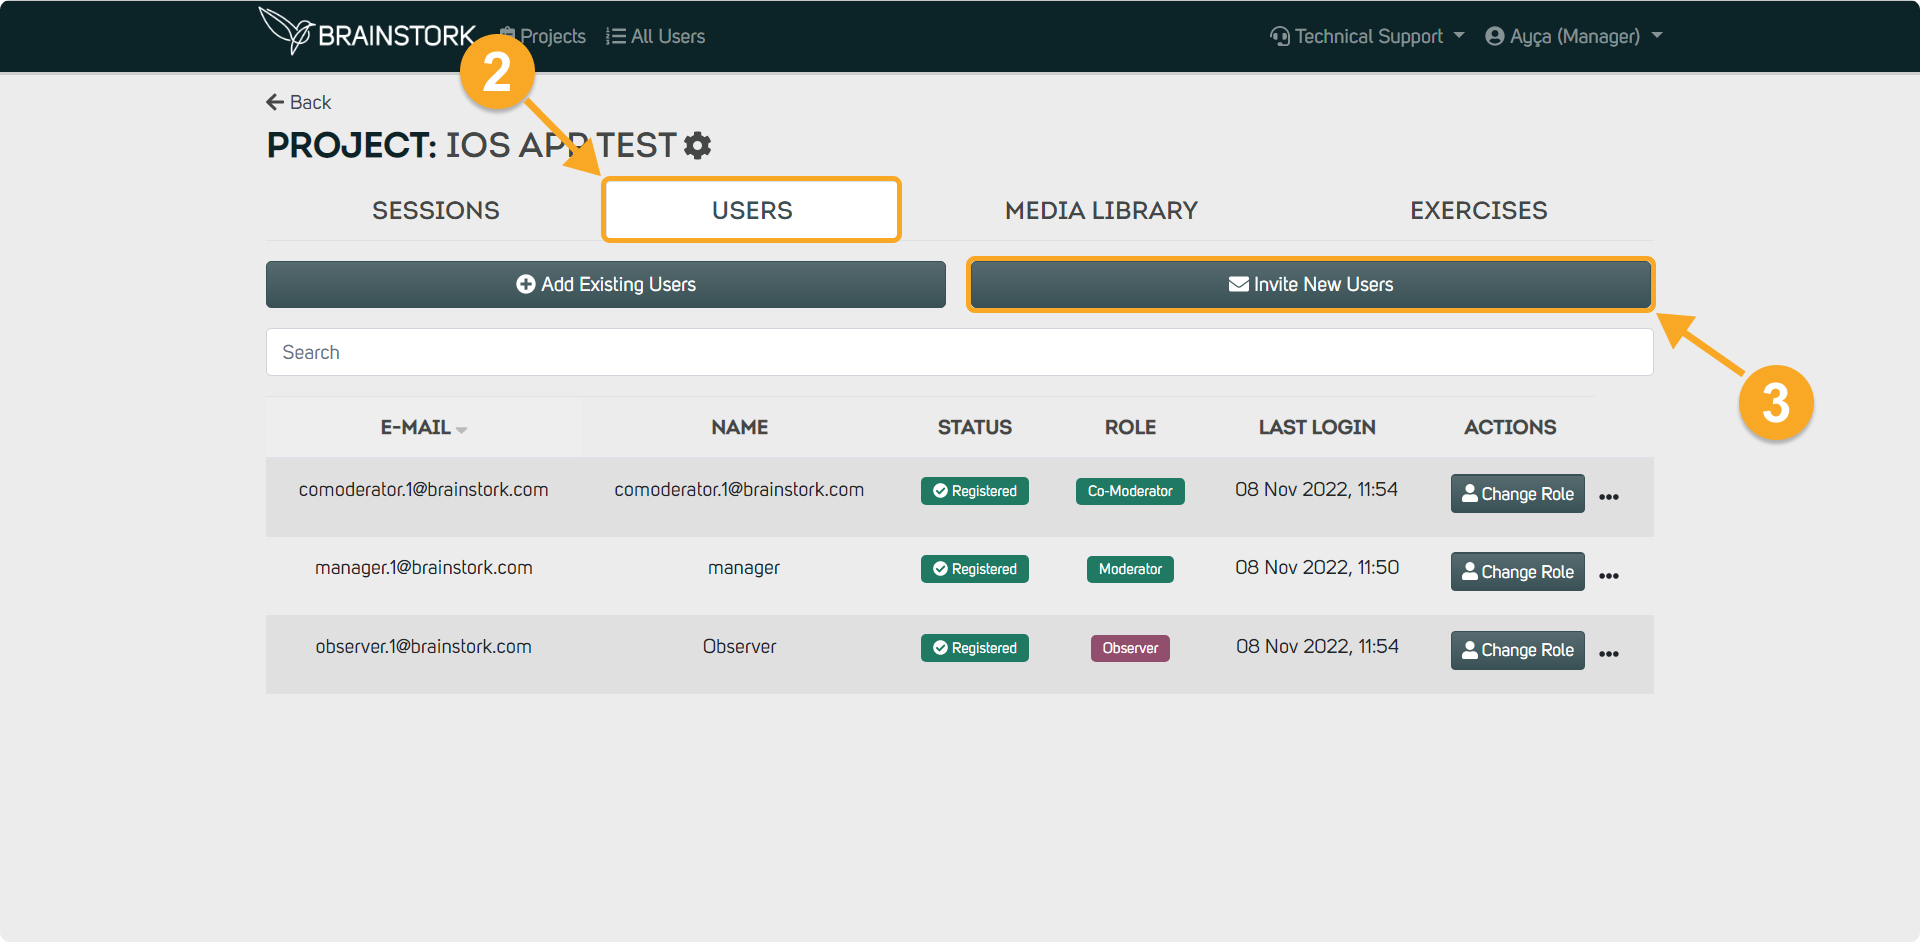
Inviting New Users to the Project
Adding a user specifically to a project grants them access only to that project. They do not have access to other projects unless they have been added to those as well.
1. Open the desired project.

2. Click the "Users" tab.
3. Click the "Invite New Users" button.
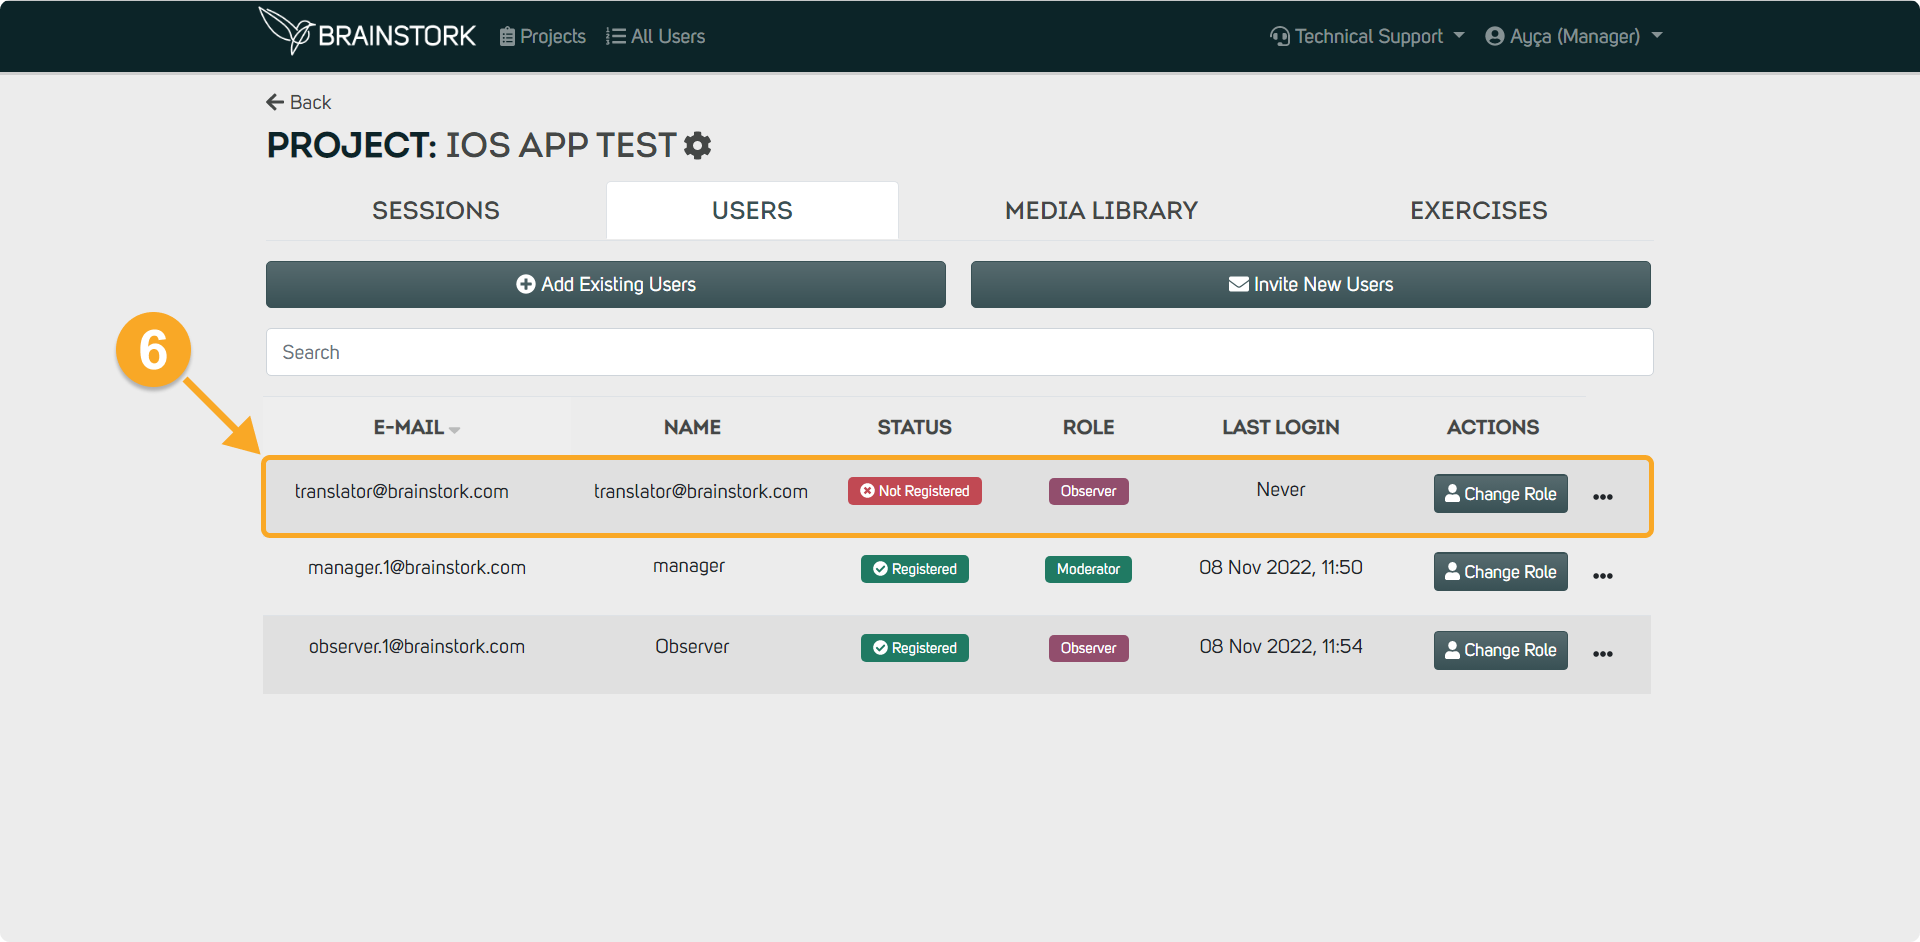
4. Write the email addresses of the users you wish to invite.
5. Click the "Invite" button.

6. They will gain access to sessions once they complete the registration process.
To resend the registration link:
You can view options to manually check or automatically resend the registration link after adding a user to the project/company.
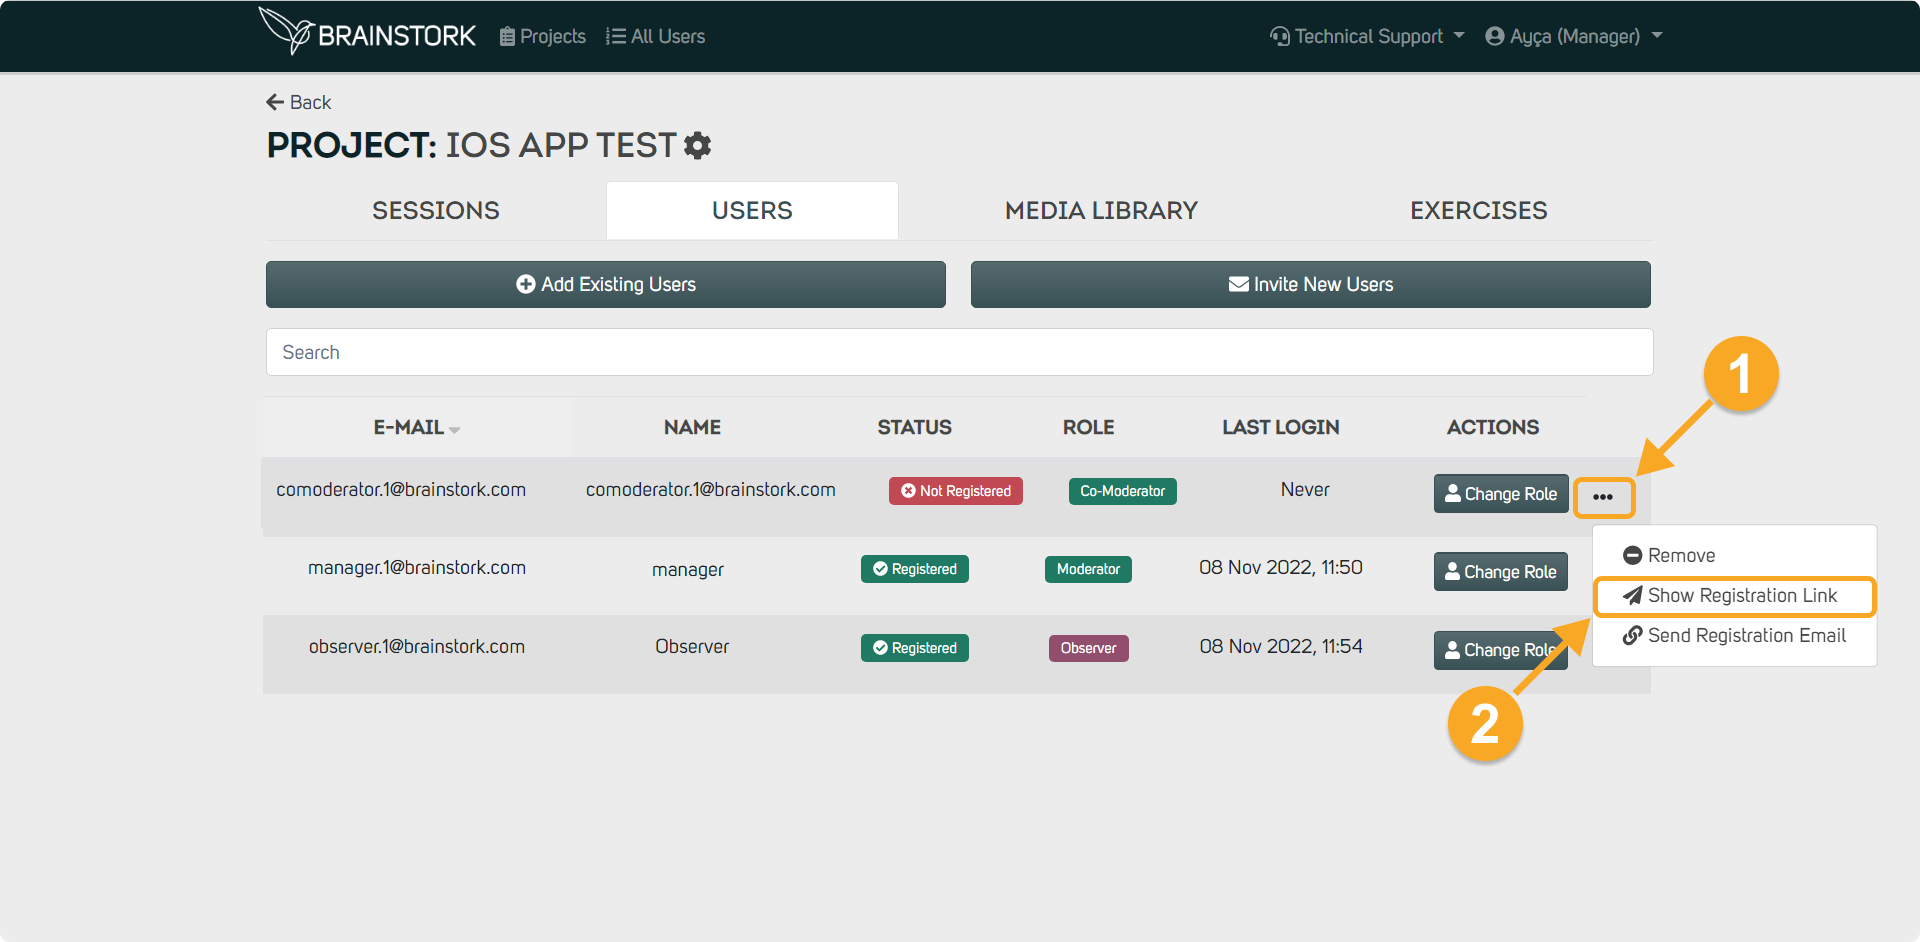
To send the registration link manually:
1. Click the three dots next to the name of the unregistered user.
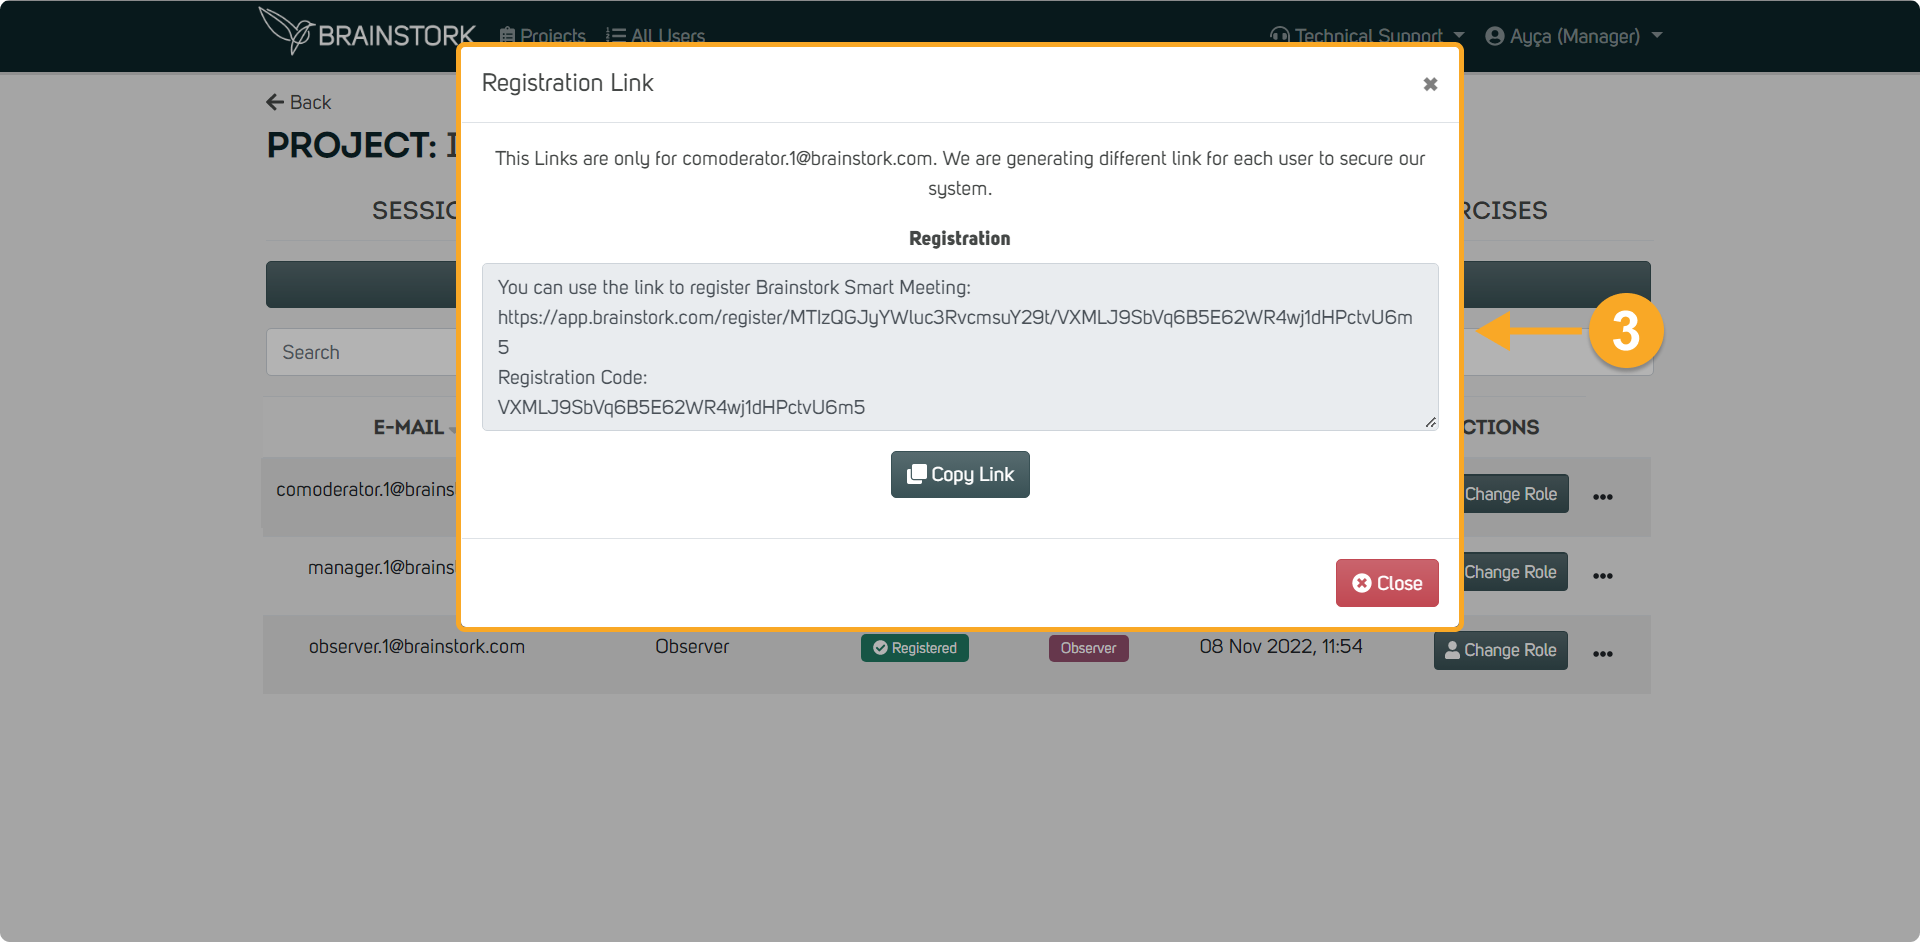
2. Click the "Show Registration Link" button to see it and send it manually.
3. A unique registration link will be displayed, which you can send manually.
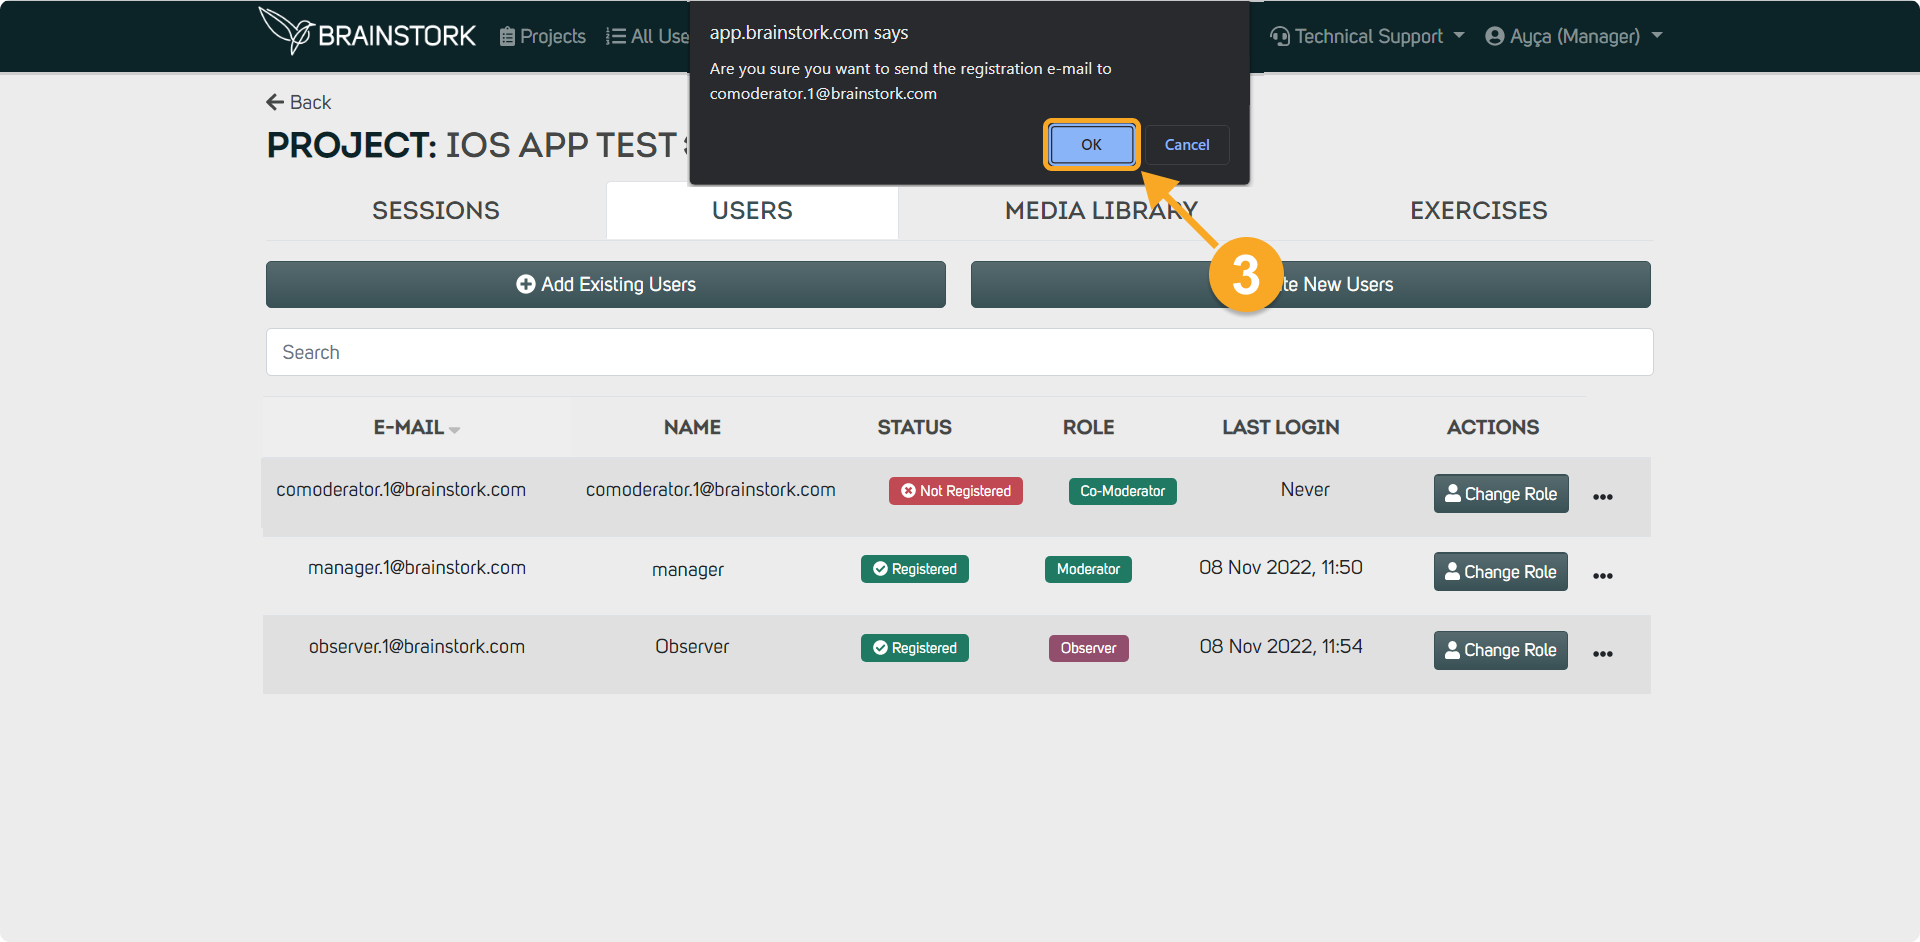
To send the registration email automatically:
1. Locate the unregistered user and click the three dots next to their name
2. Select the "Send Registration Email" button to send the email automatically.
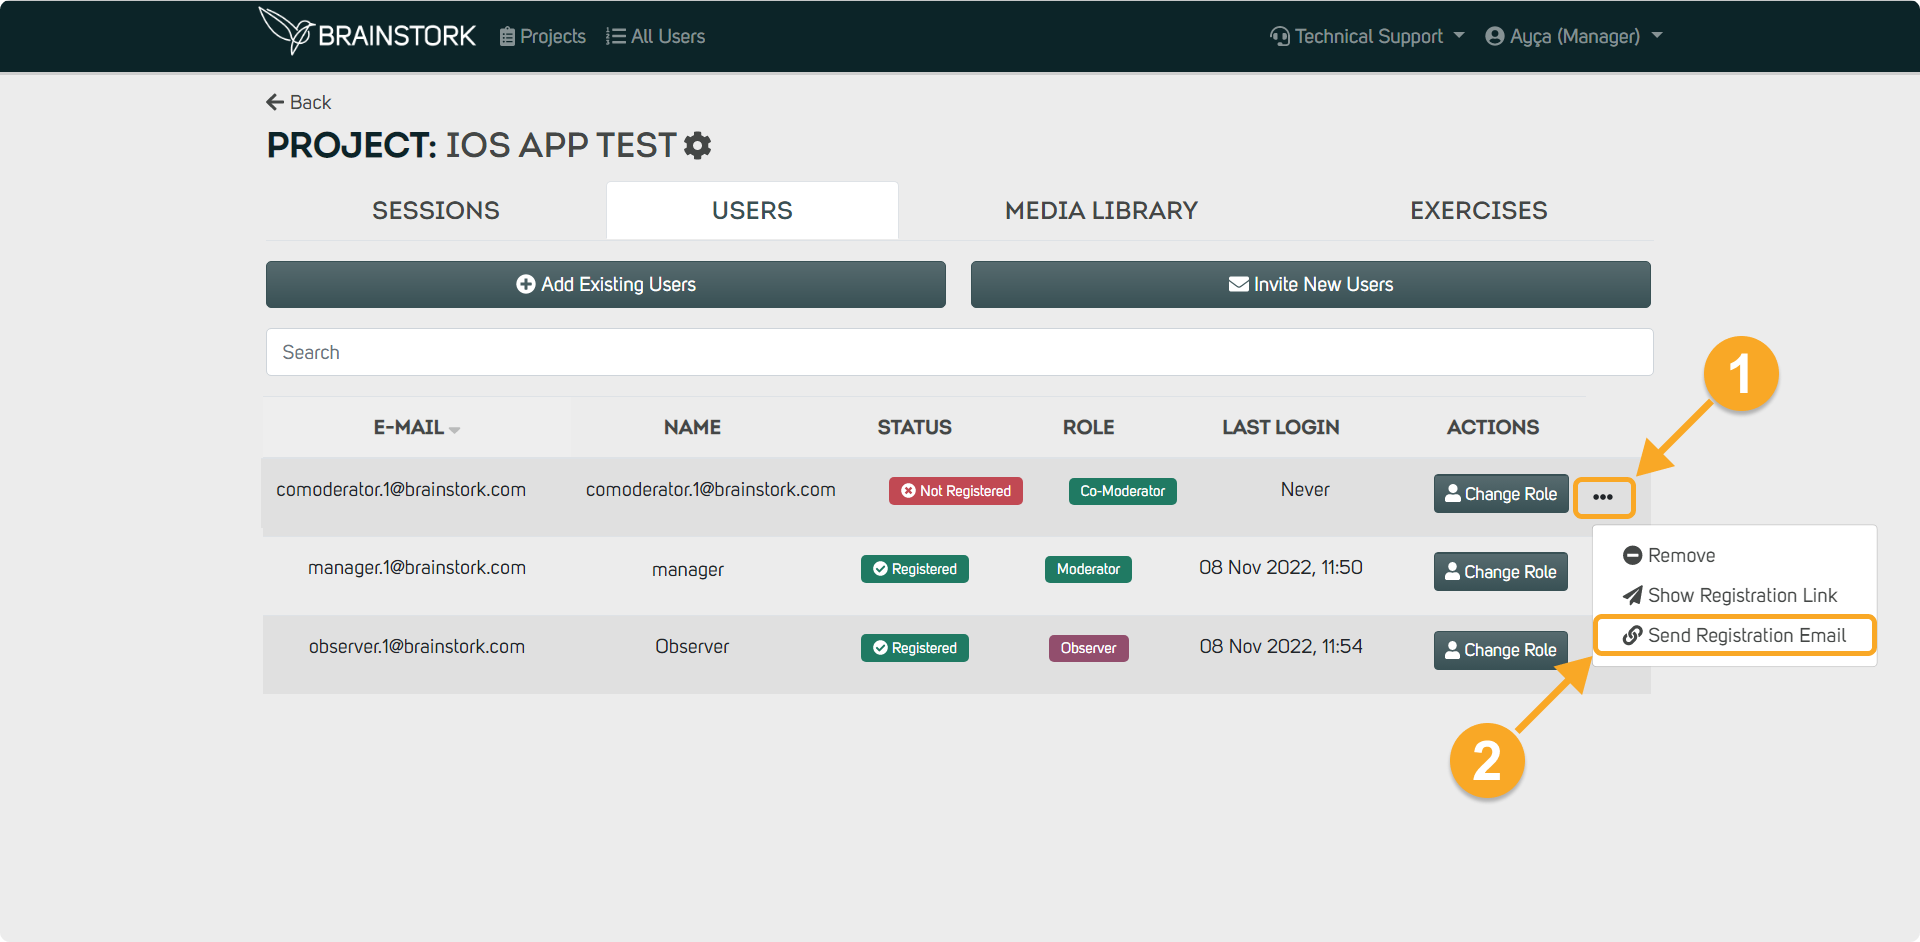
3. Confirm your action by clicking "OK" in the pop-up message to send an automated email with the personalized registration link.