You need a Brainstork manager or project manager account to edit a session.
Once a session has been created, you will be able to access the "Edit" button.
You can change the following:
1. The Session's Name
2. The Session's Date & Time
3. The Session's Users with this "Edit" button.
To Edit the Name of a Session:
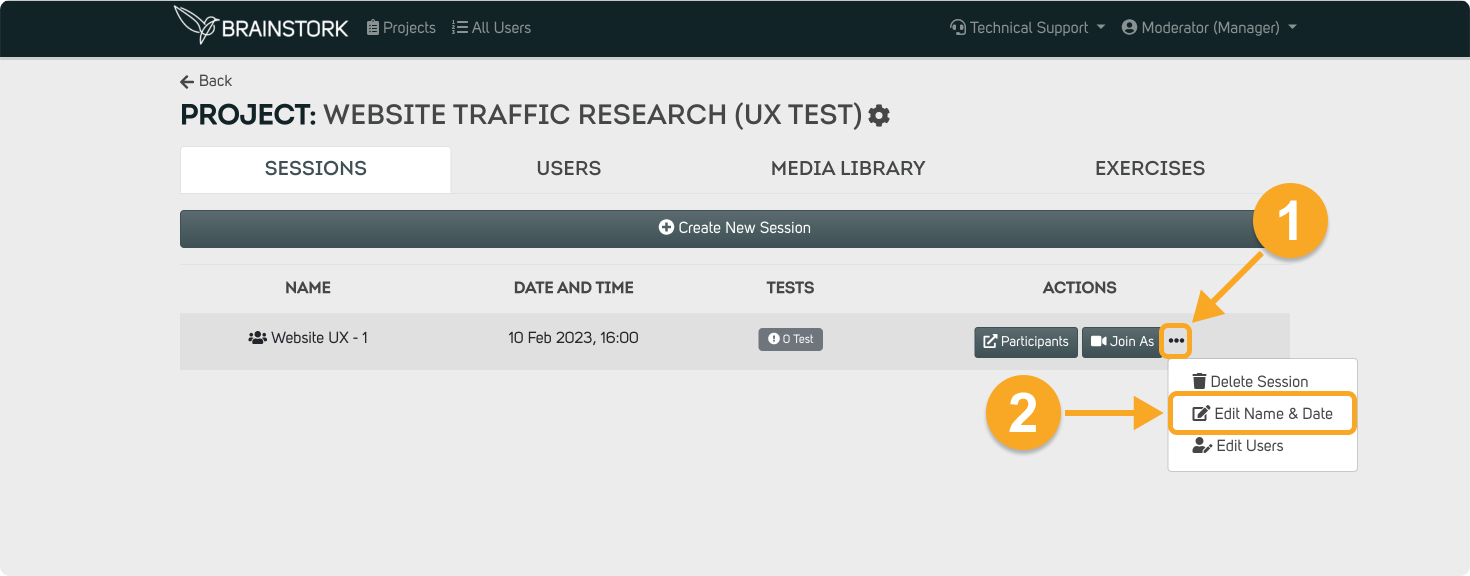
1. Click the three dots next to the session's name.
2. Choose the "Edit Name&Date".
3. Enter a new name for the session.
4. Click the "Save" button to apply the changes.

To Edit the Date&Time of a Session:
1. Click the three dots next to the session's name.
2. Click the "Edit Name & Date".

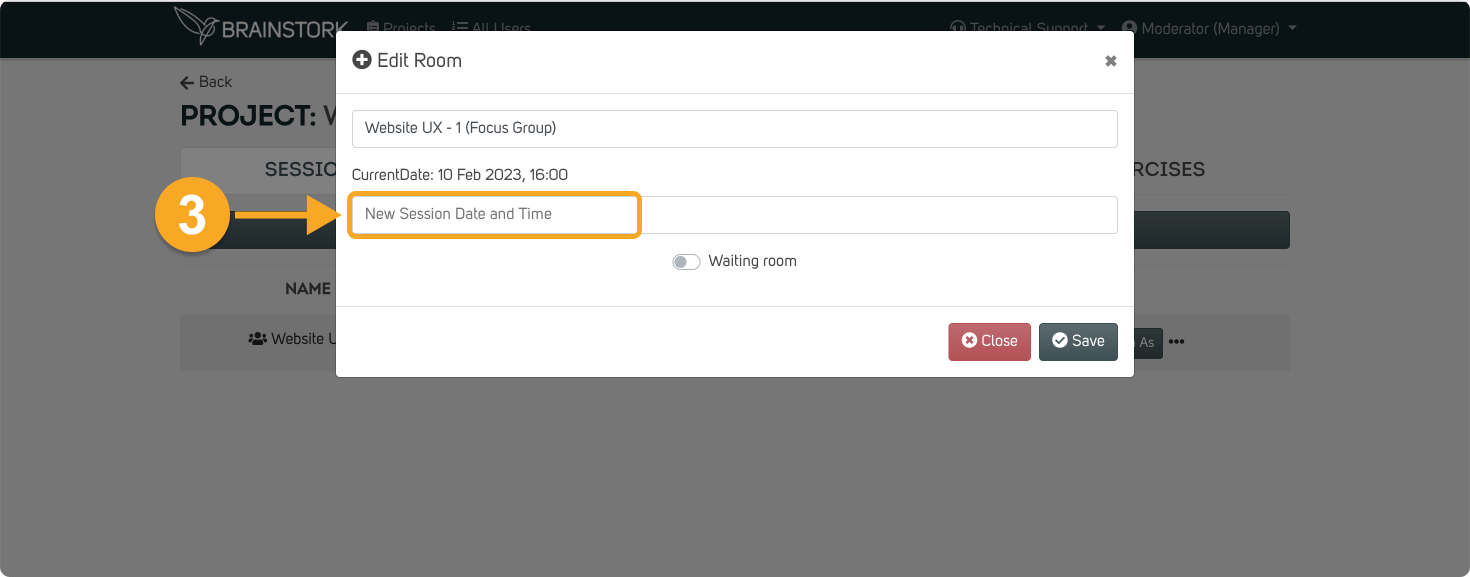
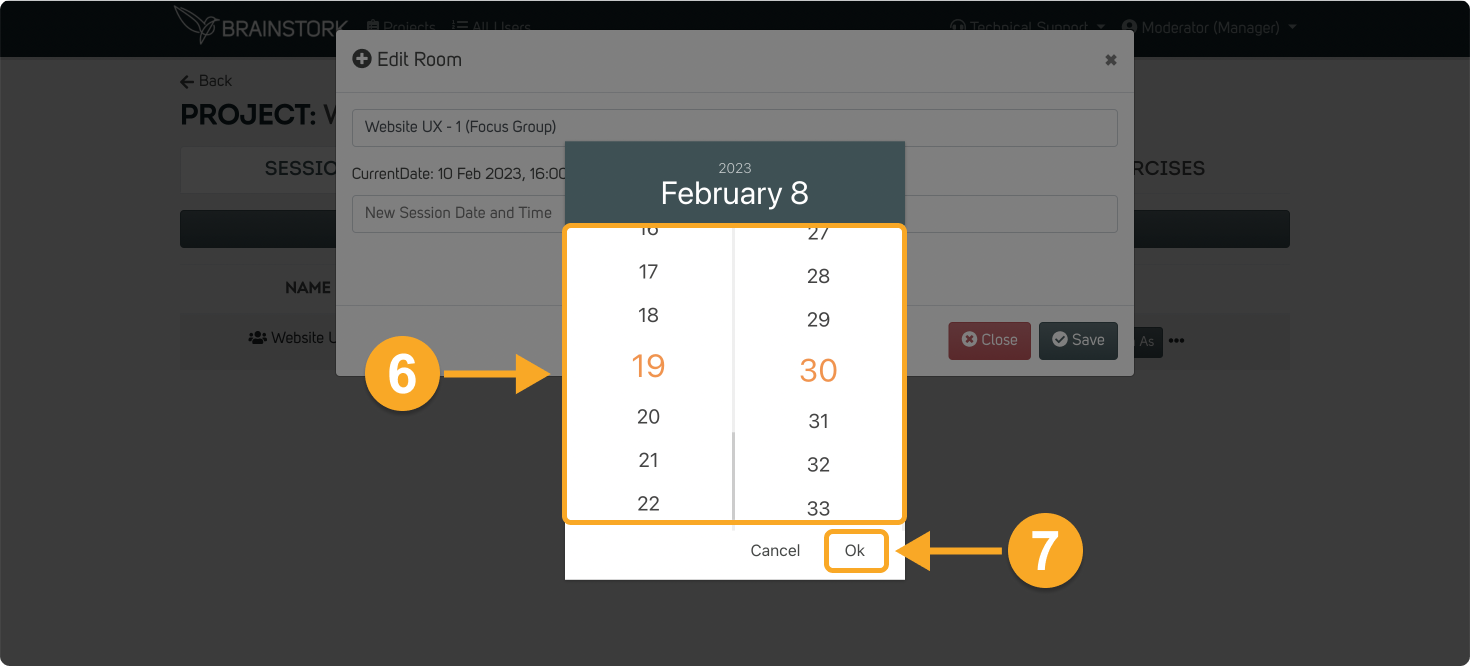
3. Select " New Session Date and Time".
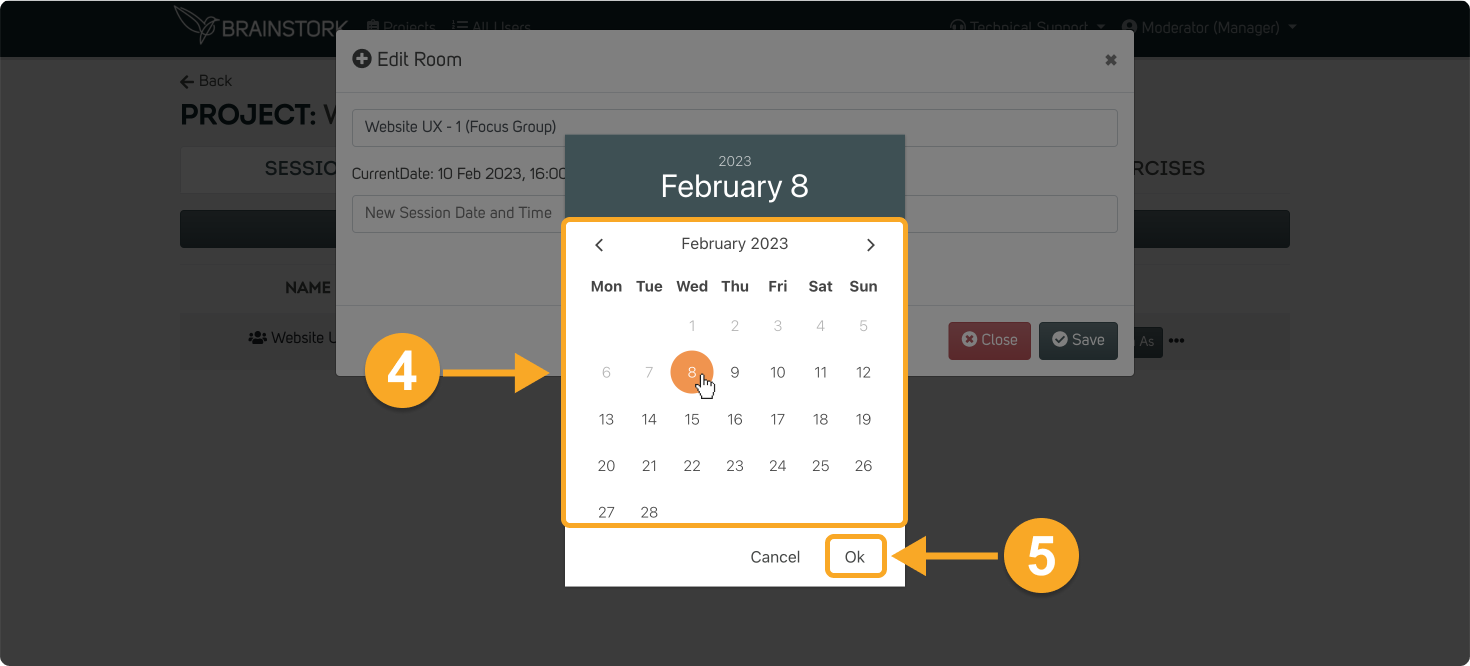
4. Choose the new date.
5. Click "Ok".
6. Choose a new time.
7. Click "Ok".
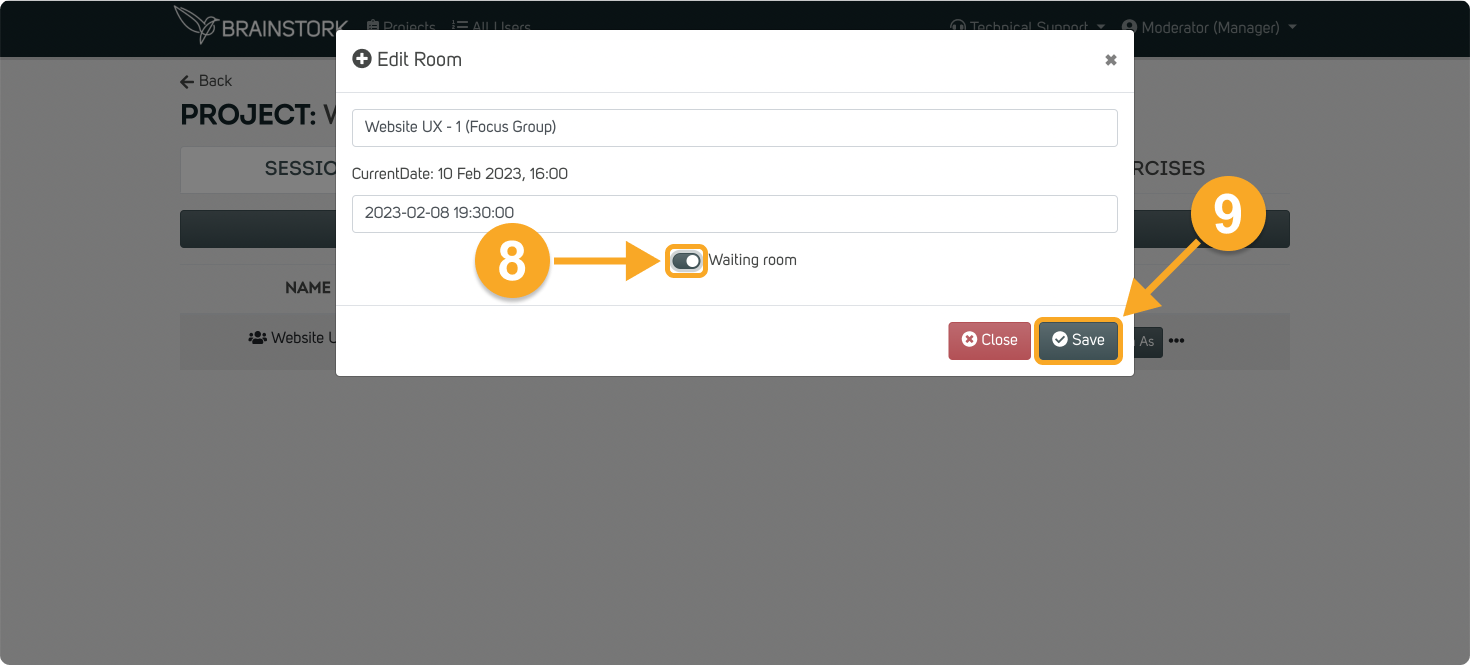
8. You can enable the "Waiting Room" by clicking on the toggle button optionally.
9. Click "Save" to apply the changes.
To Edit the Users of a Session:
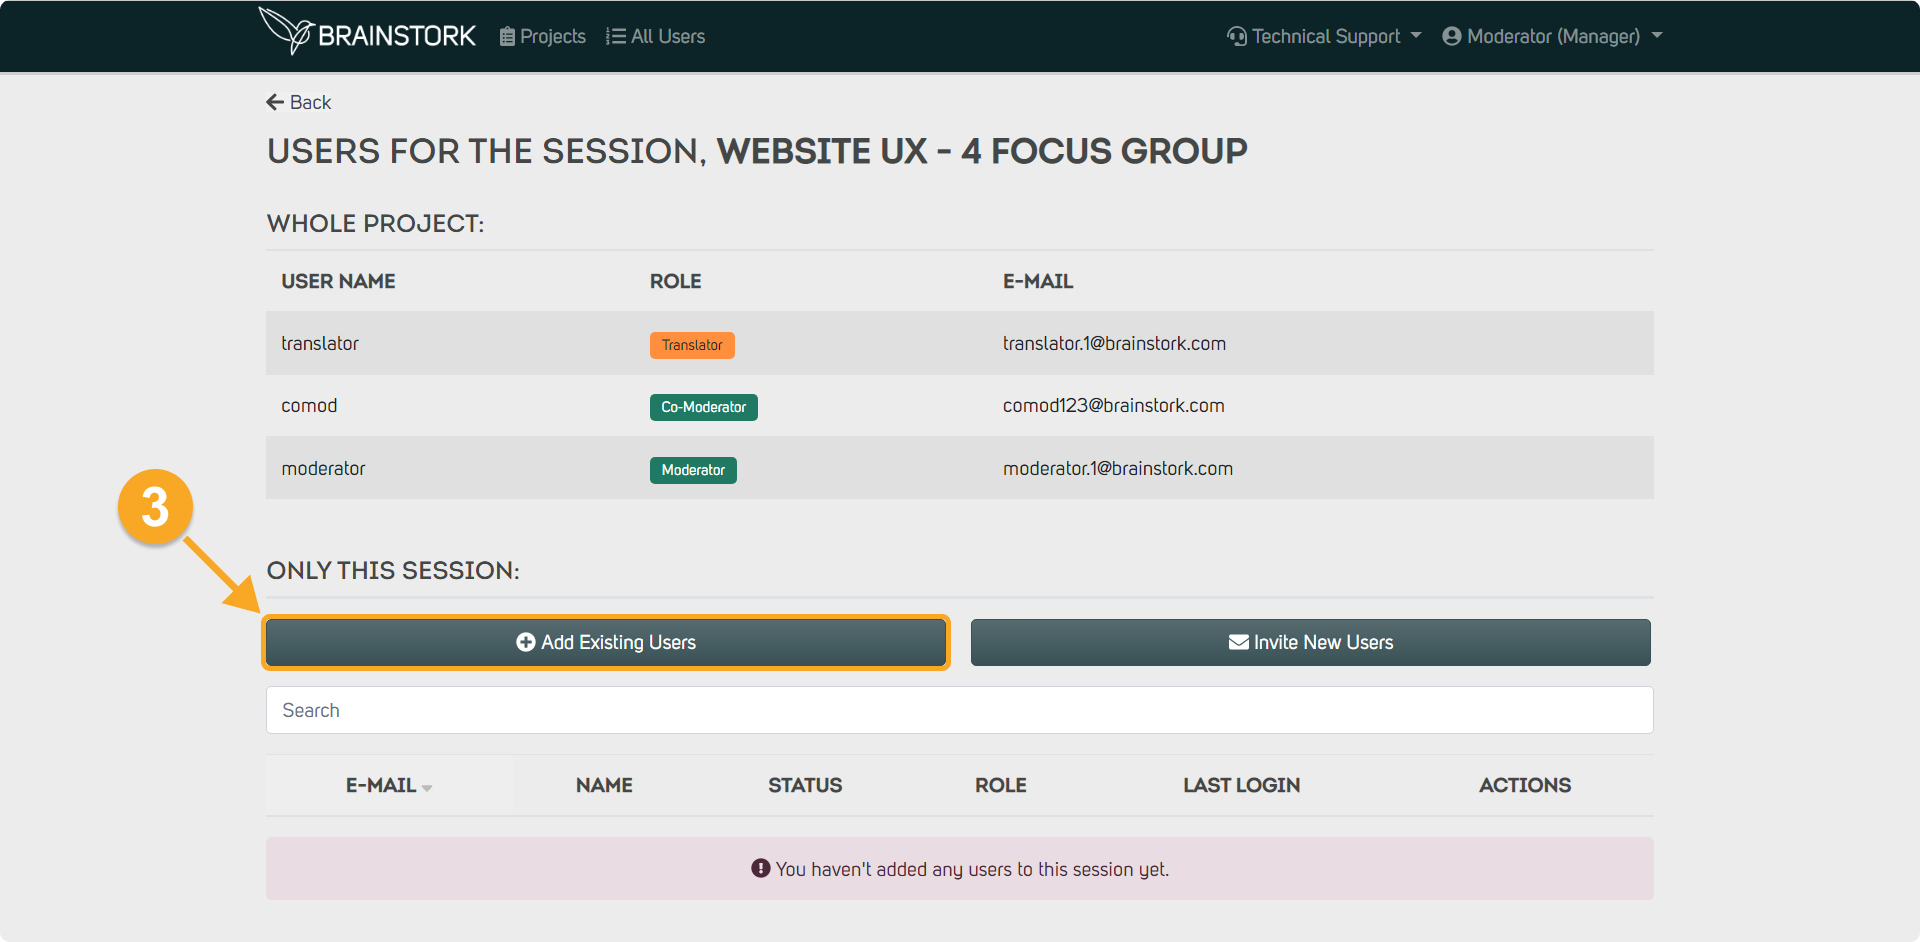
If a user is only invited to one specific session within a project, they can be added to that session using the "Edit" button. The user will only have access to the session they have been added to.
1. Click the three dots near the session's name.
2. Click " Edit Users".

3. To add an existing user, click "Add Existing User" and select the desired user.
4. Click "Add" next to the selected user.
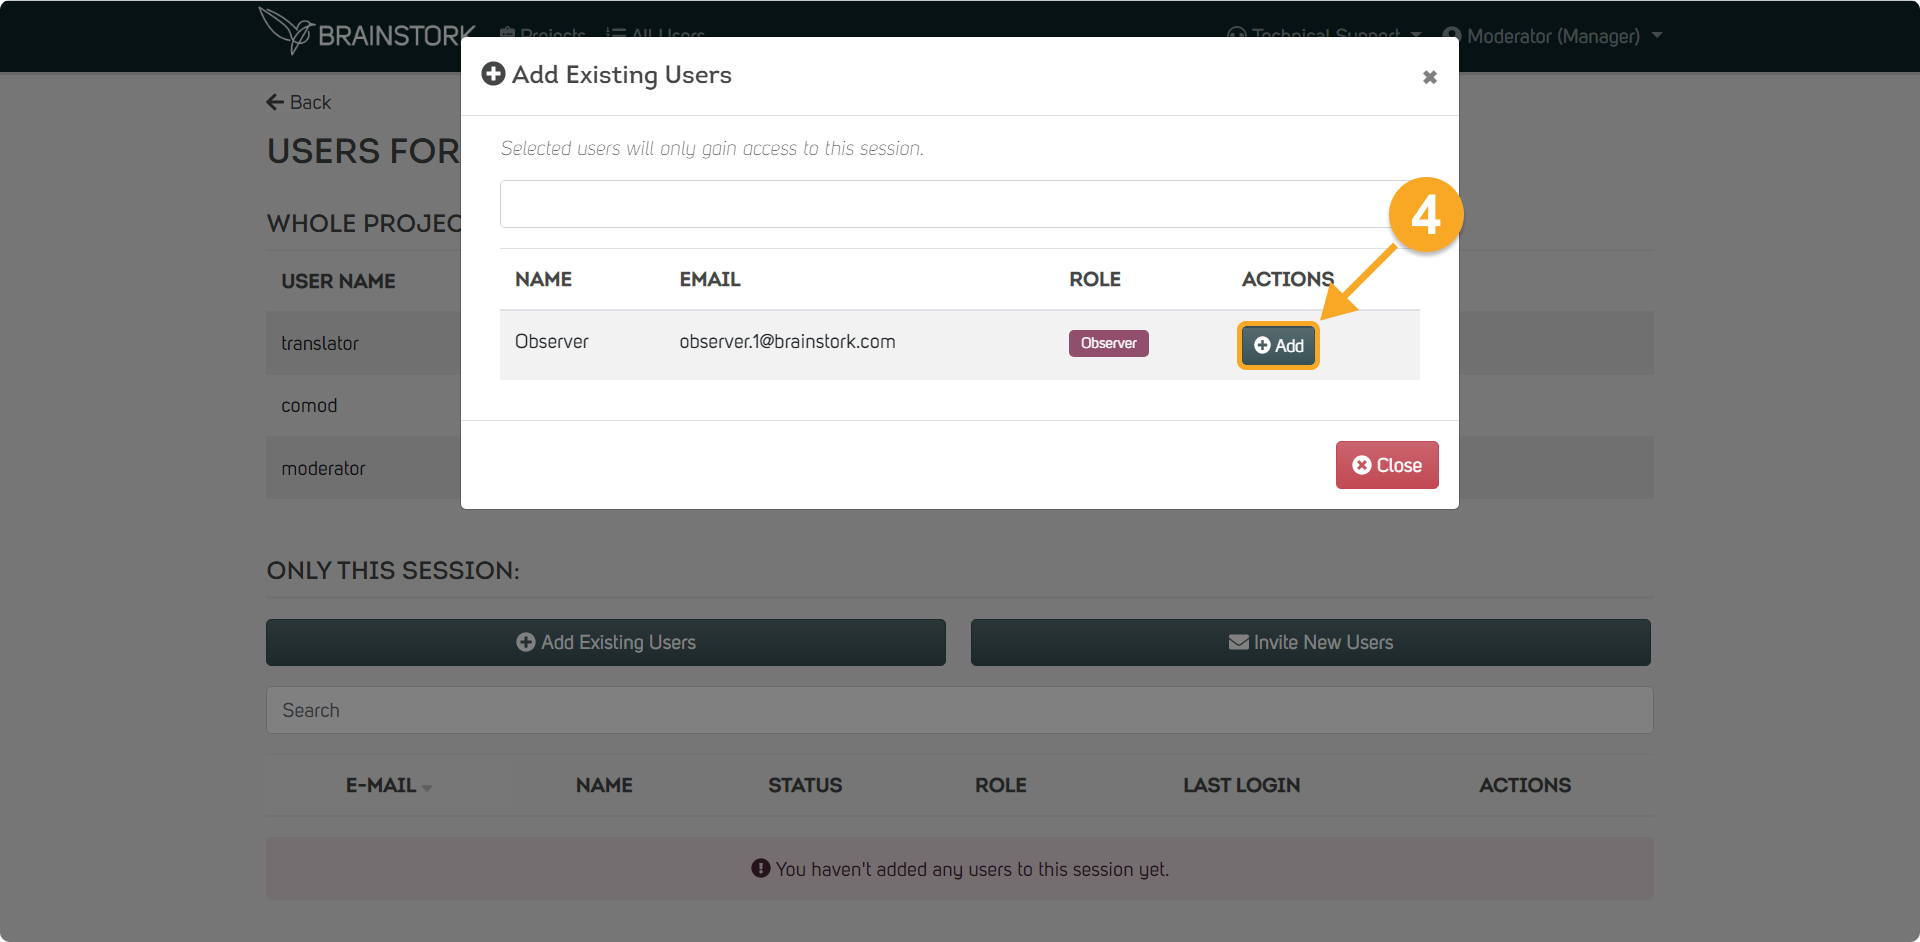
5. The user will appear under the "Only this session" list.

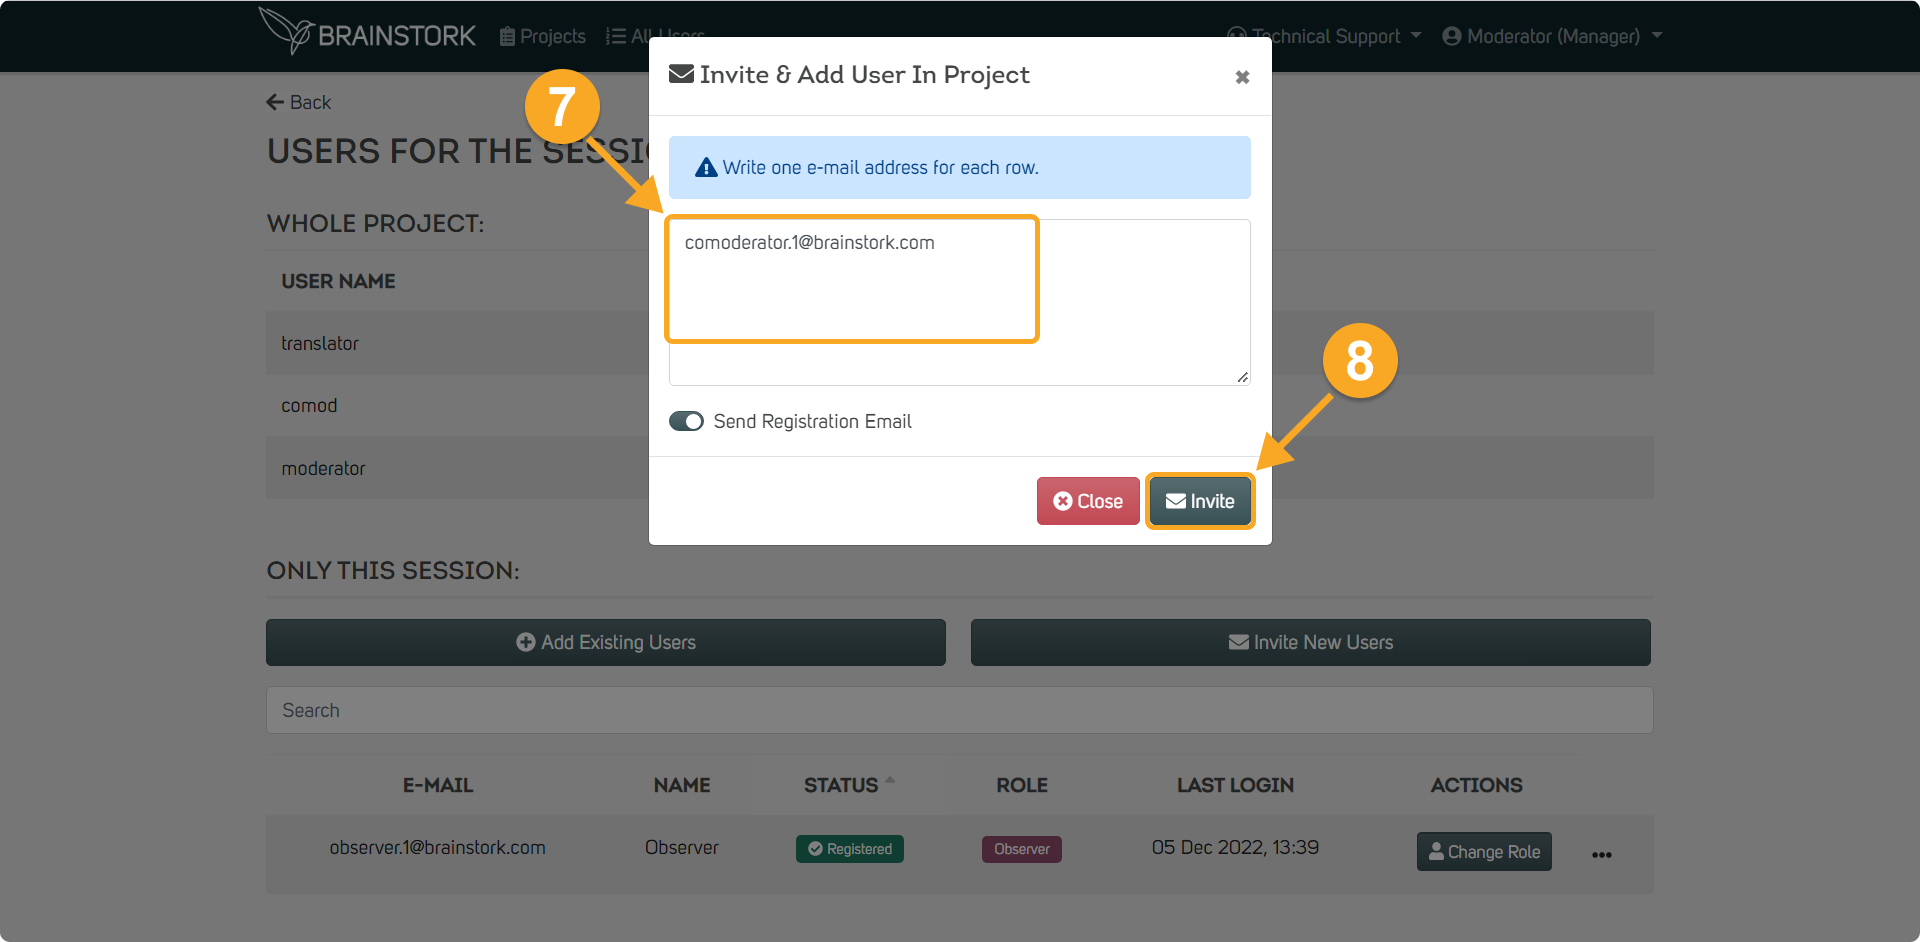
6. Also, you can invite new users to only one session by clicking the "Invite New Users" button.

7. Enter email addresses in separate rows.
8. Finally, click "Invite" to send the invitations.