As a Recruiter, once your Project Manager or Manager adds you to the project, you have the authority to create and edit sessions, as well as view and share session links for participants.
Here are the steps to create a new session and share its invitation linkwith participants:
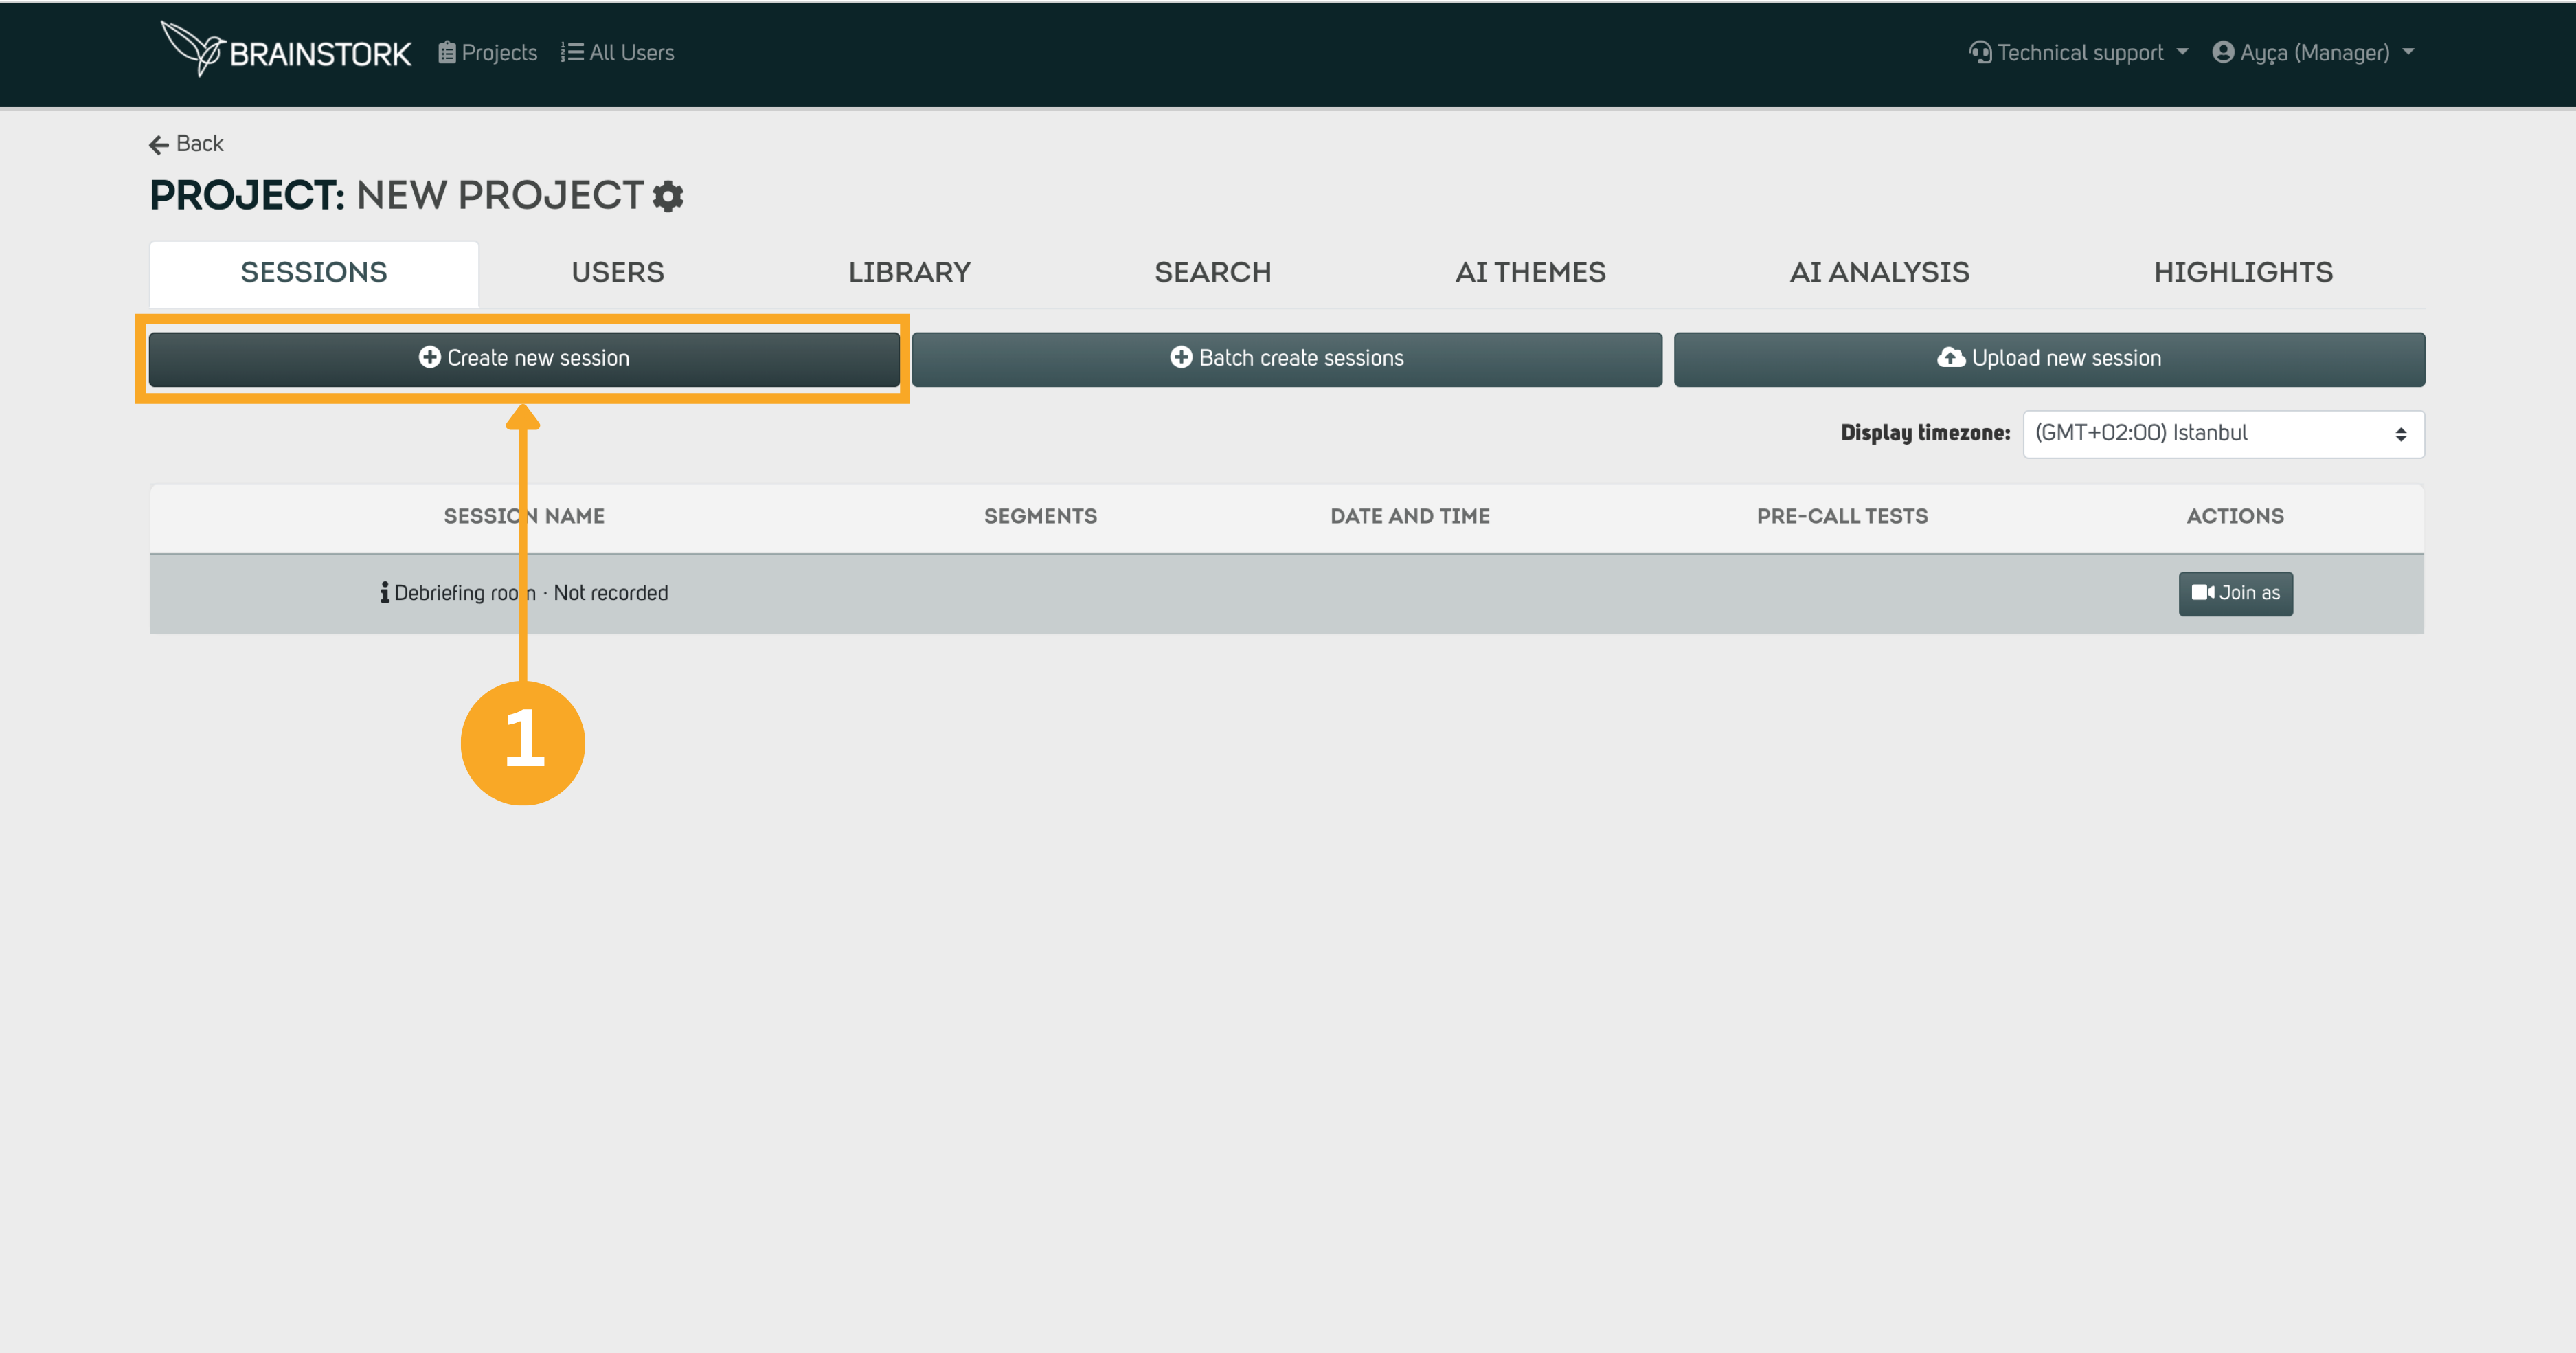
1. Open the project and click Create New Session.
.png)
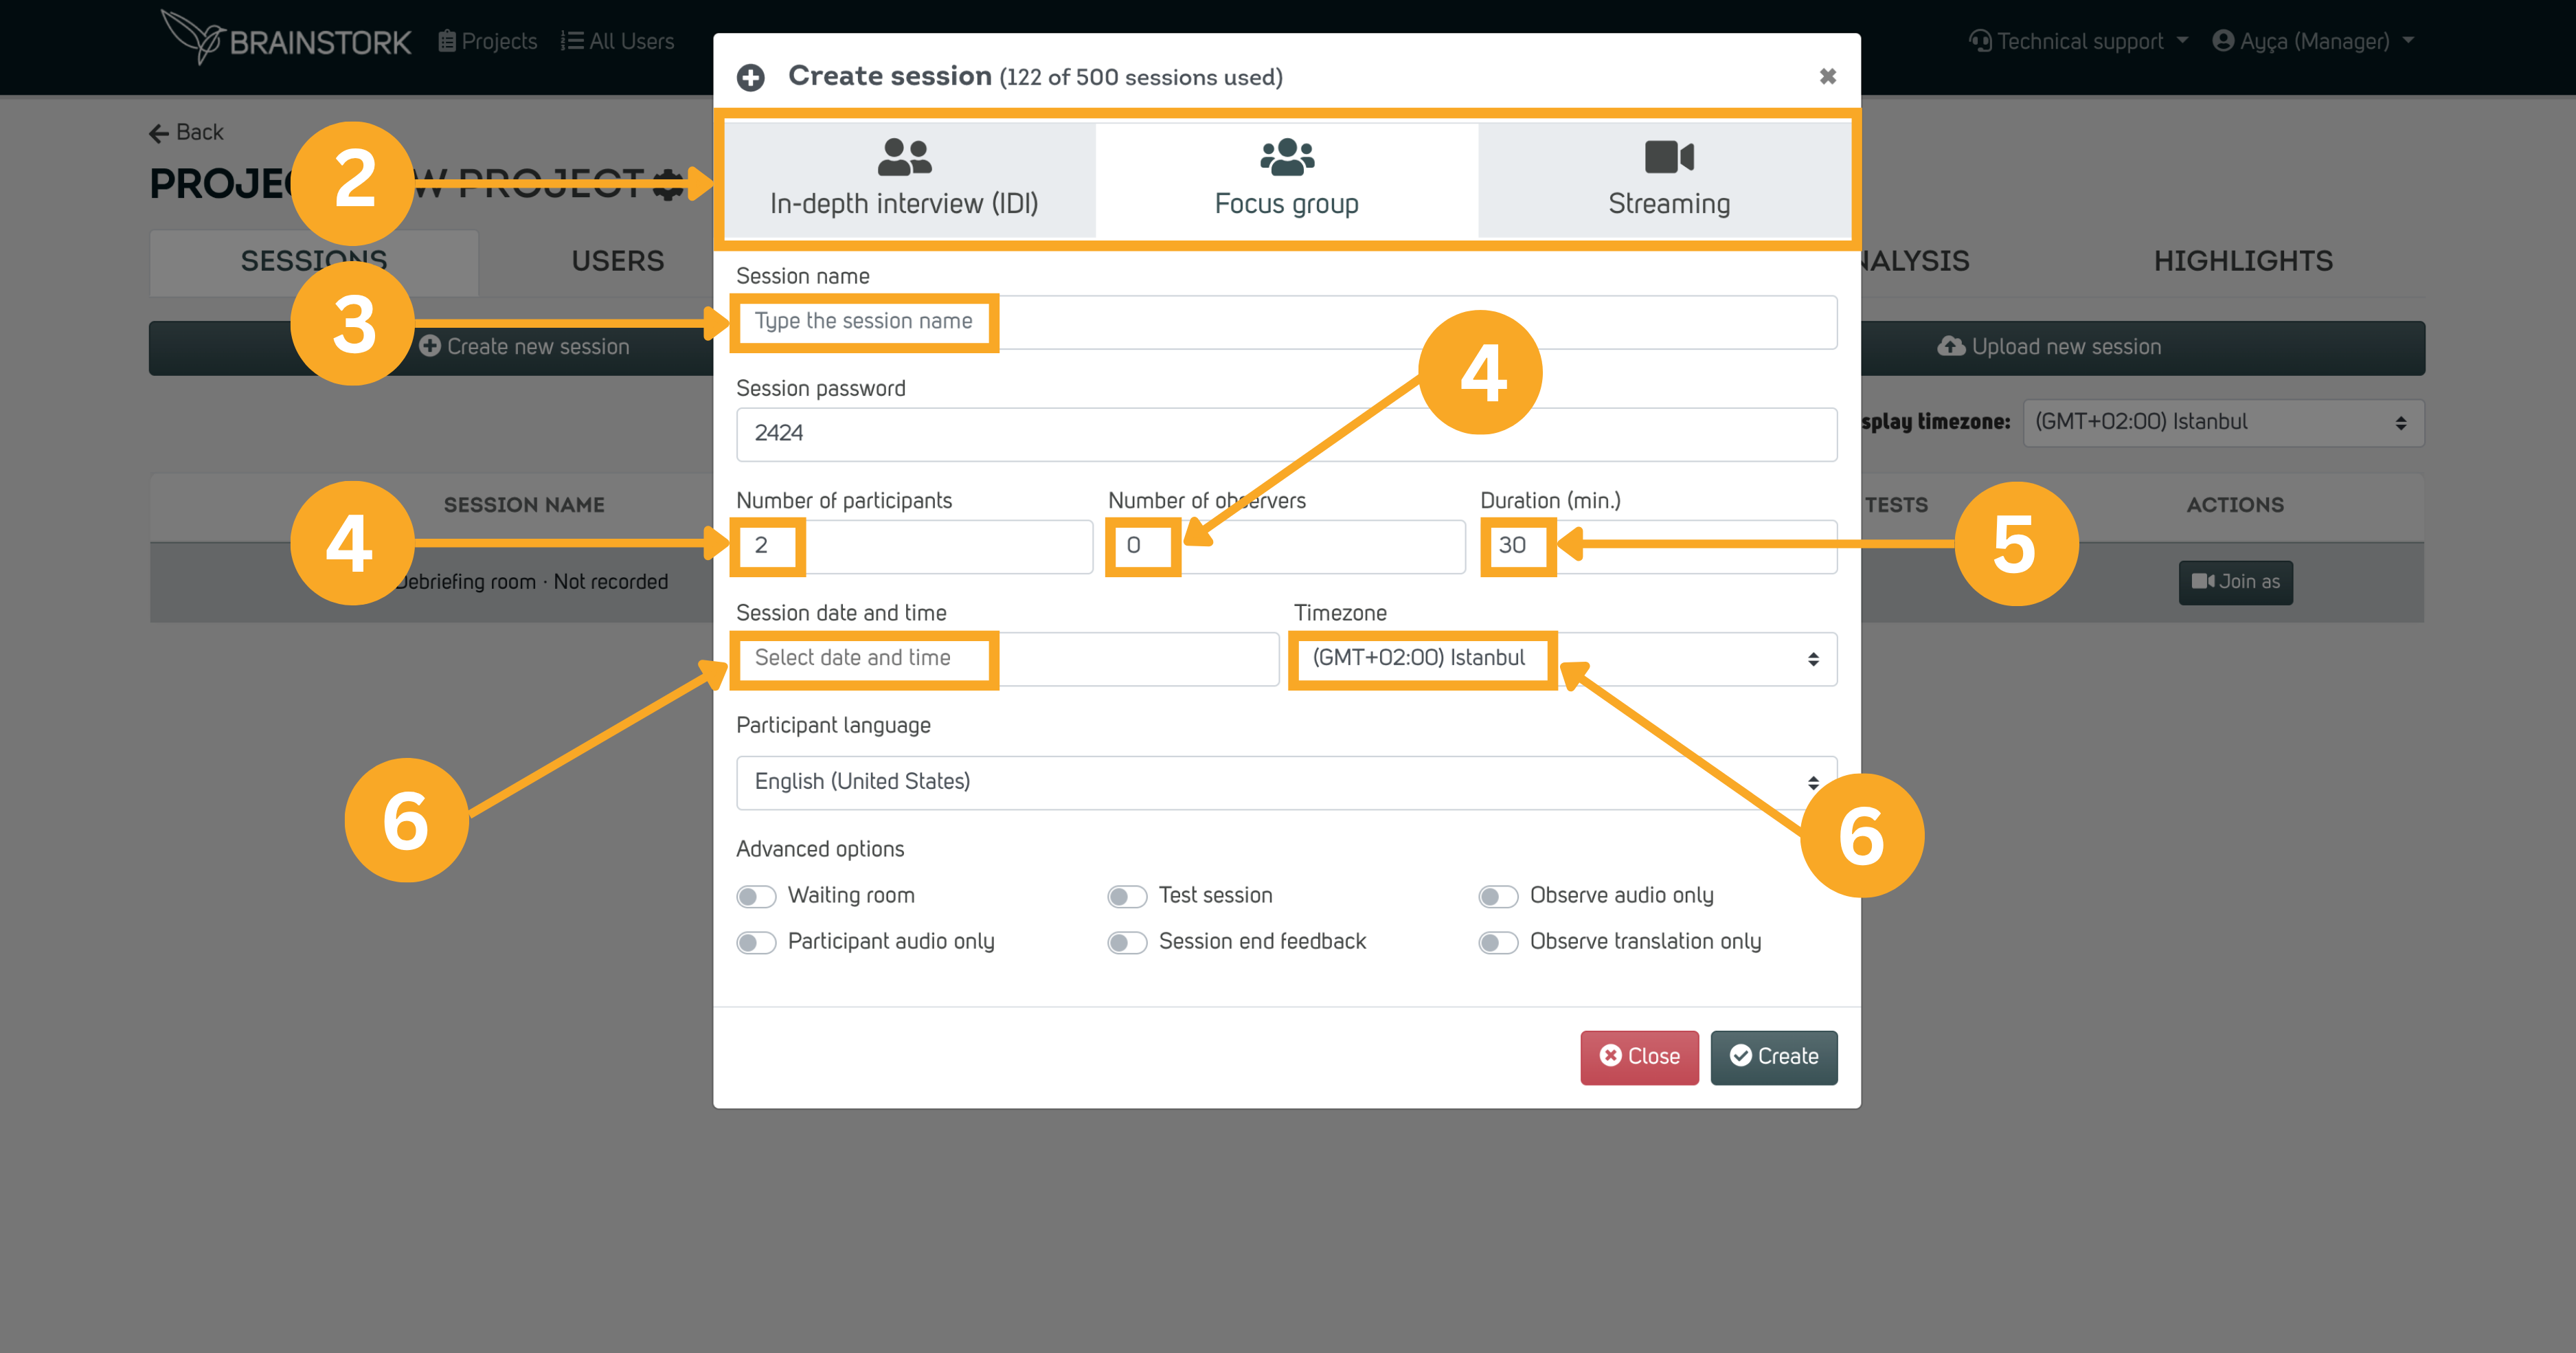
2. Select the session type.
3. Enter a session name.
4. Enter the number of participants and observers.
5. Select the session duration.
6. Set the date, time, and time zone.
.png)
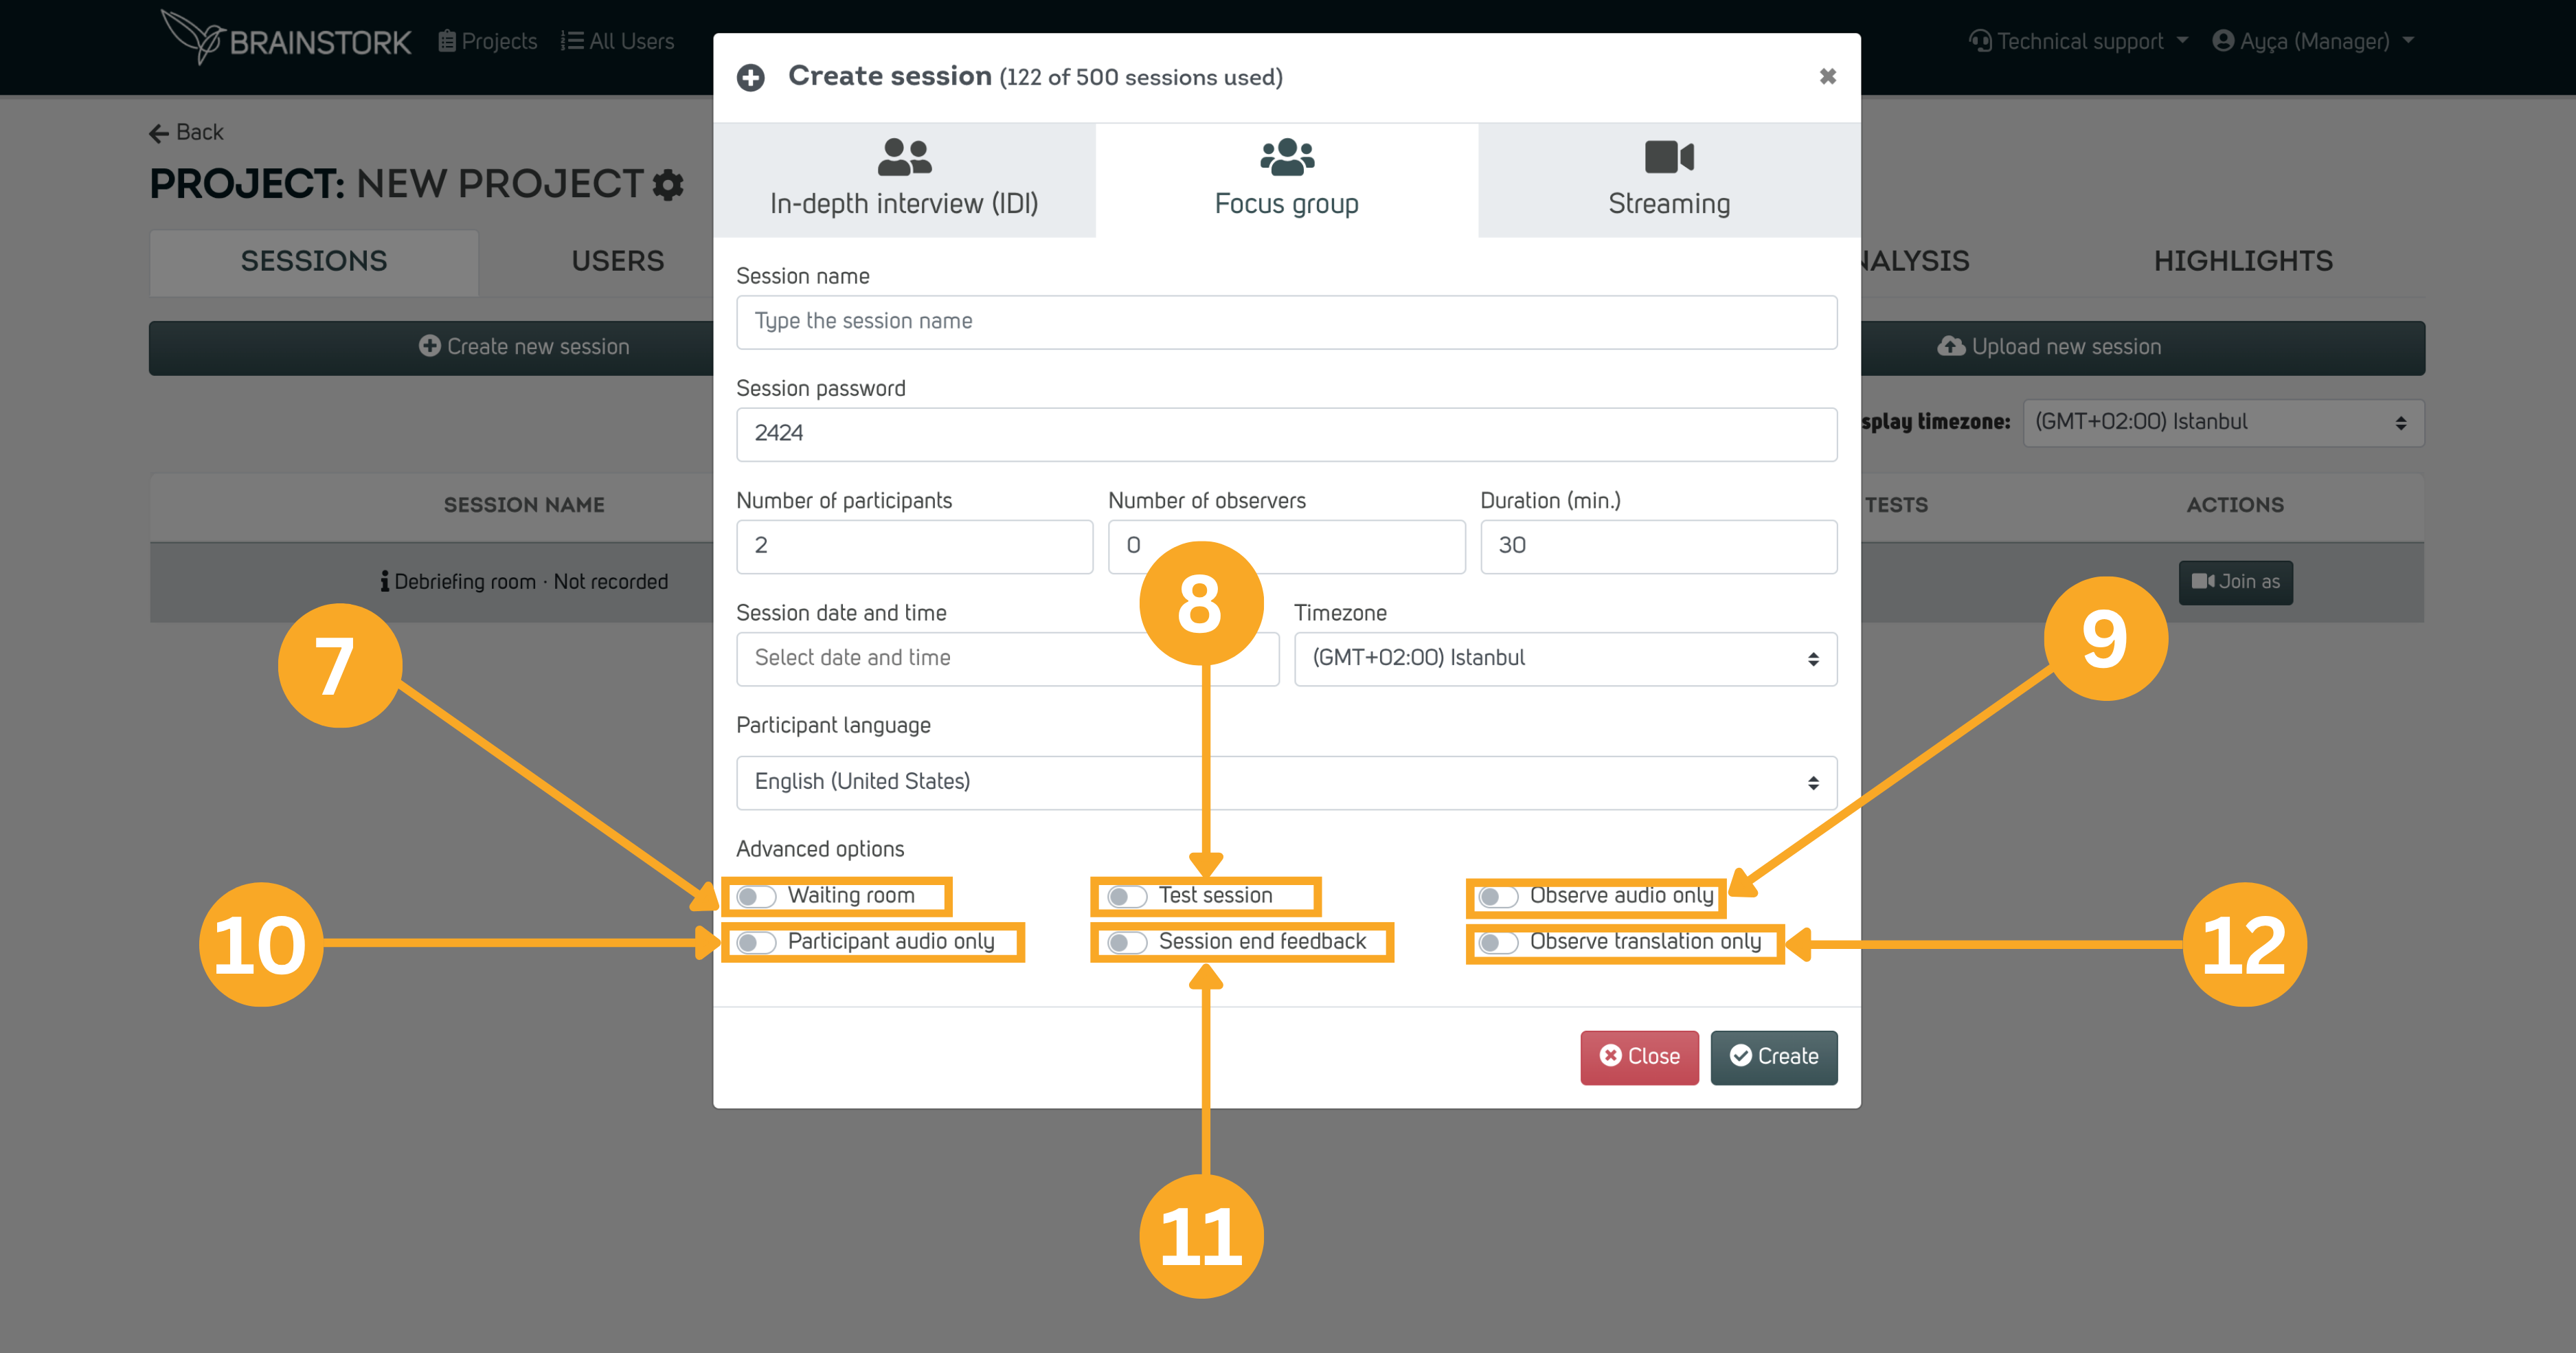
When creating a session, you also have advanced options available. Below, you can find the details for each feature:
7. Waiting Room: Gives moderators better control over participant entry to the session.
8. Test Session: Creates a risk-free environment where users can explore and get familiarized with the platform. These sessions are free of charge, making them a great opportunity for users to gain hands-on experience before a live event.
9. Observe Audio Only: Allows observers to listen to the session without any video.
10. Participant Audio Only: Restricts participants to joining via audio only.
11. Session End Feedback: Displays a quick pop-up at the end of the session so users can share feedback on their experience.
12. Observe Translation Only: For sessions with simultaneous translation, allowing observers to listen only to the translated audio channel.
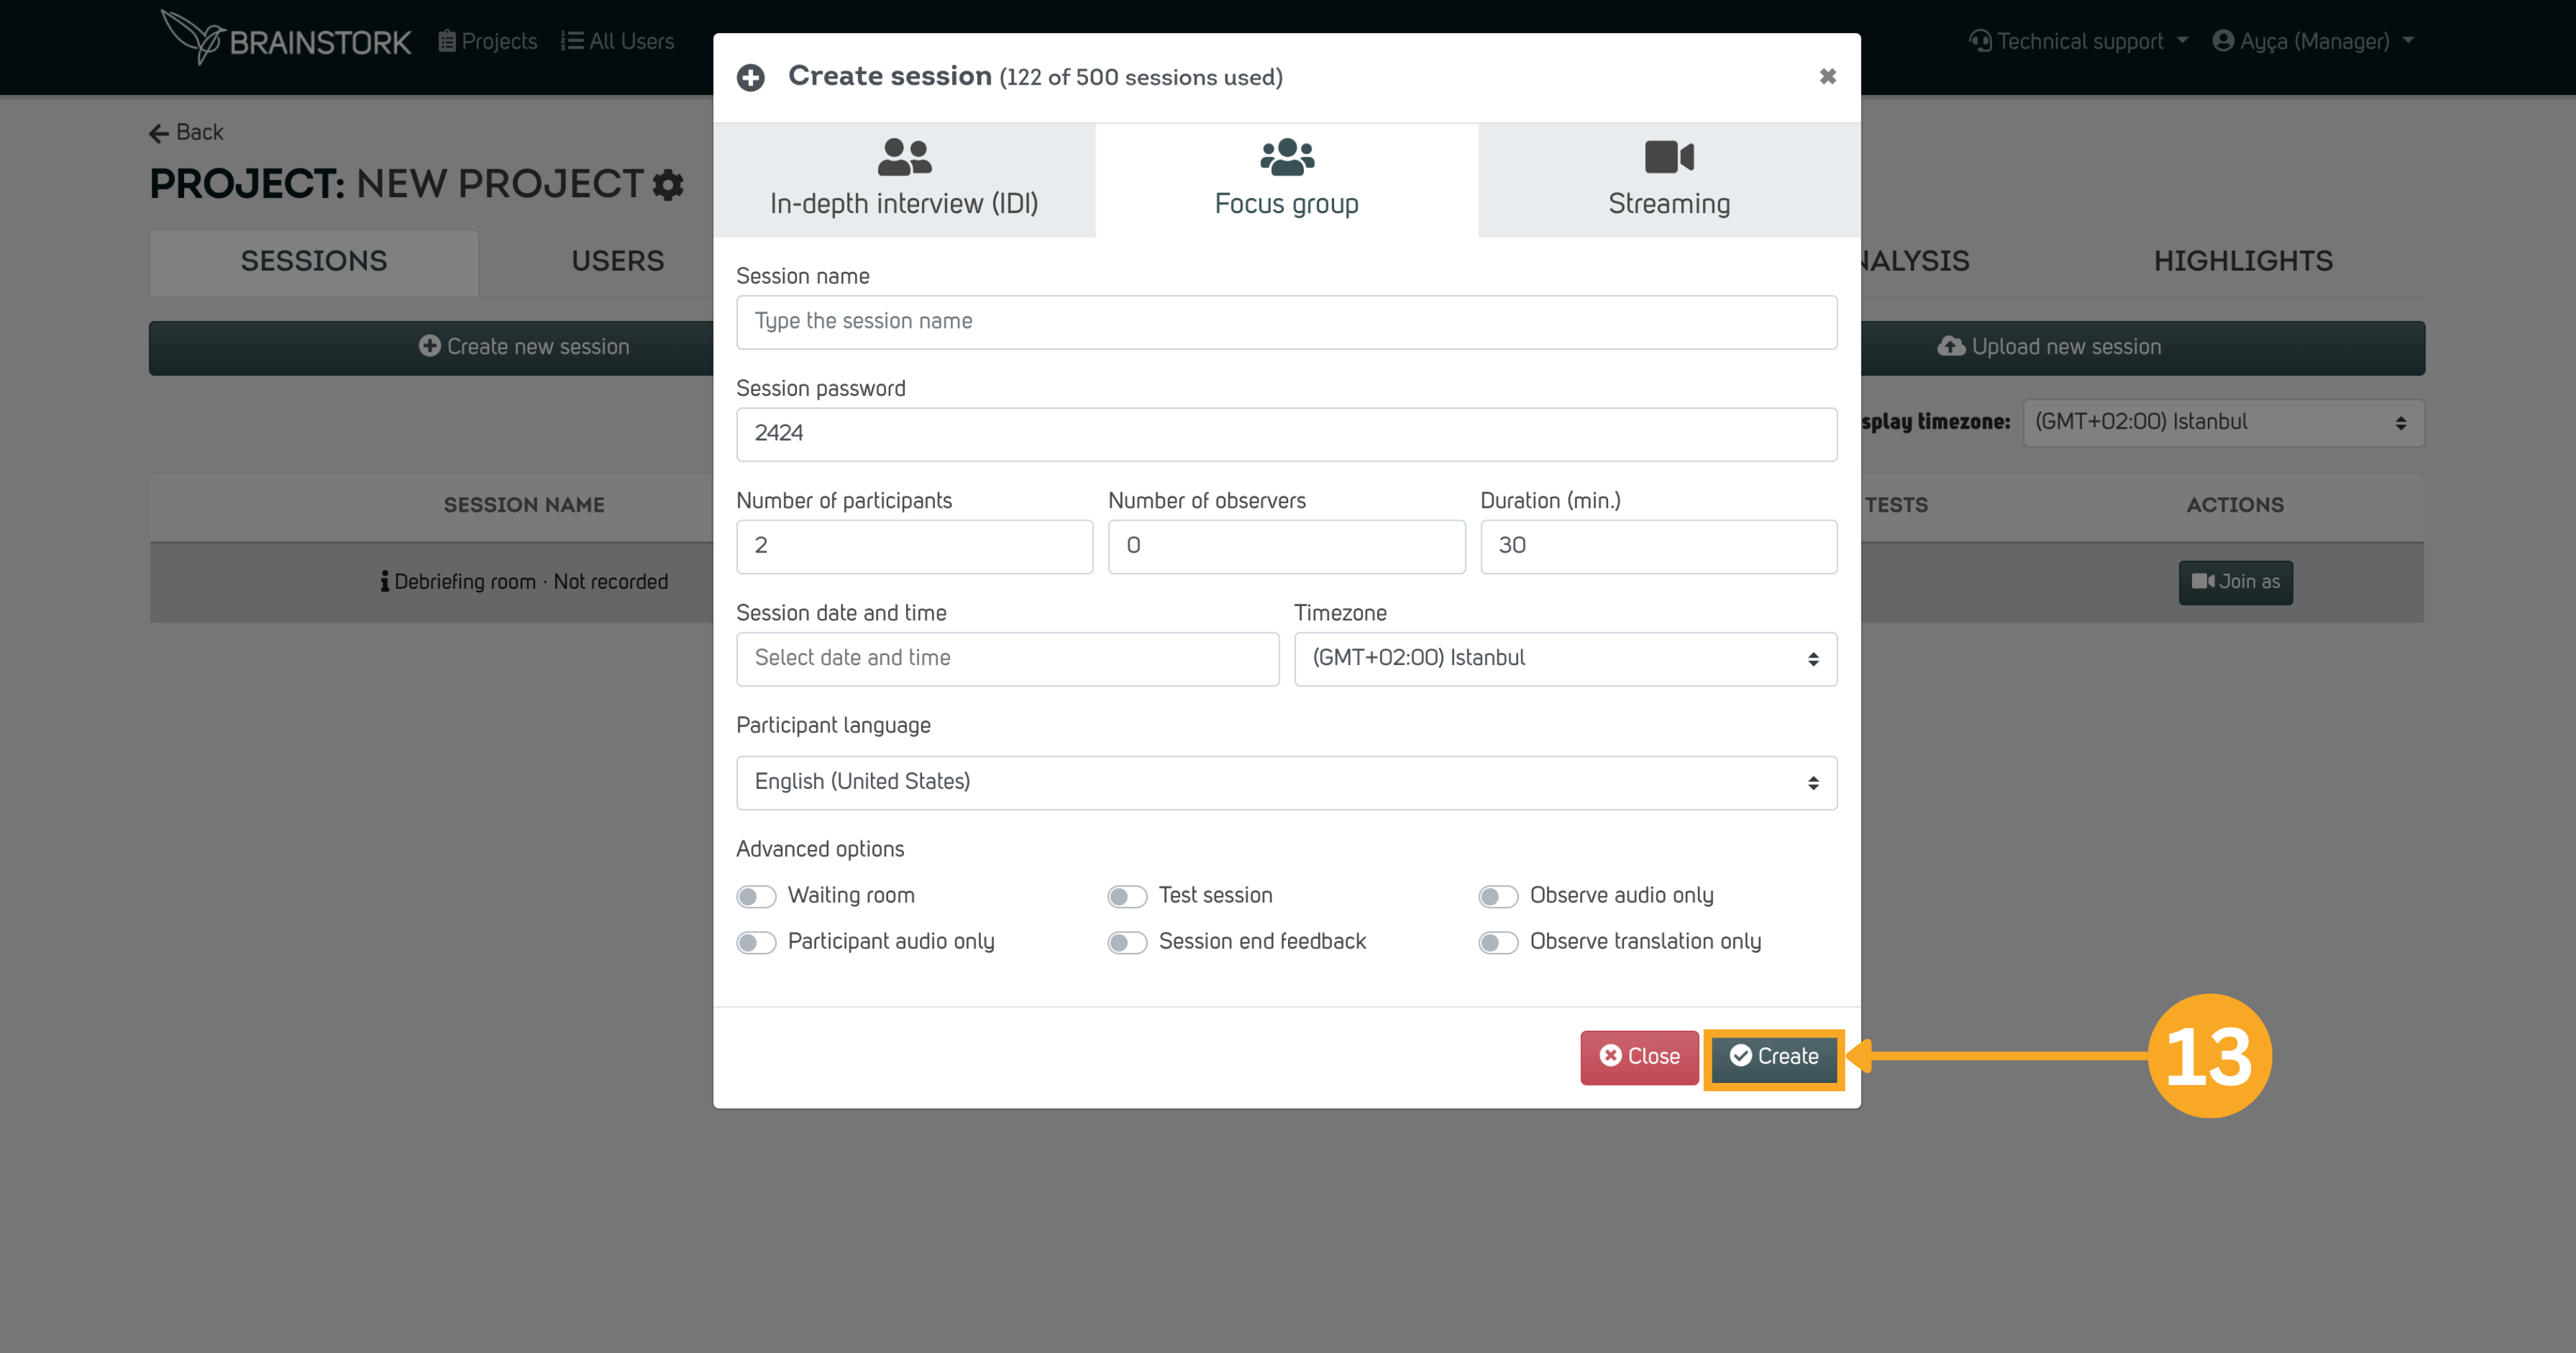
13. Click Create to create the session.
.png)
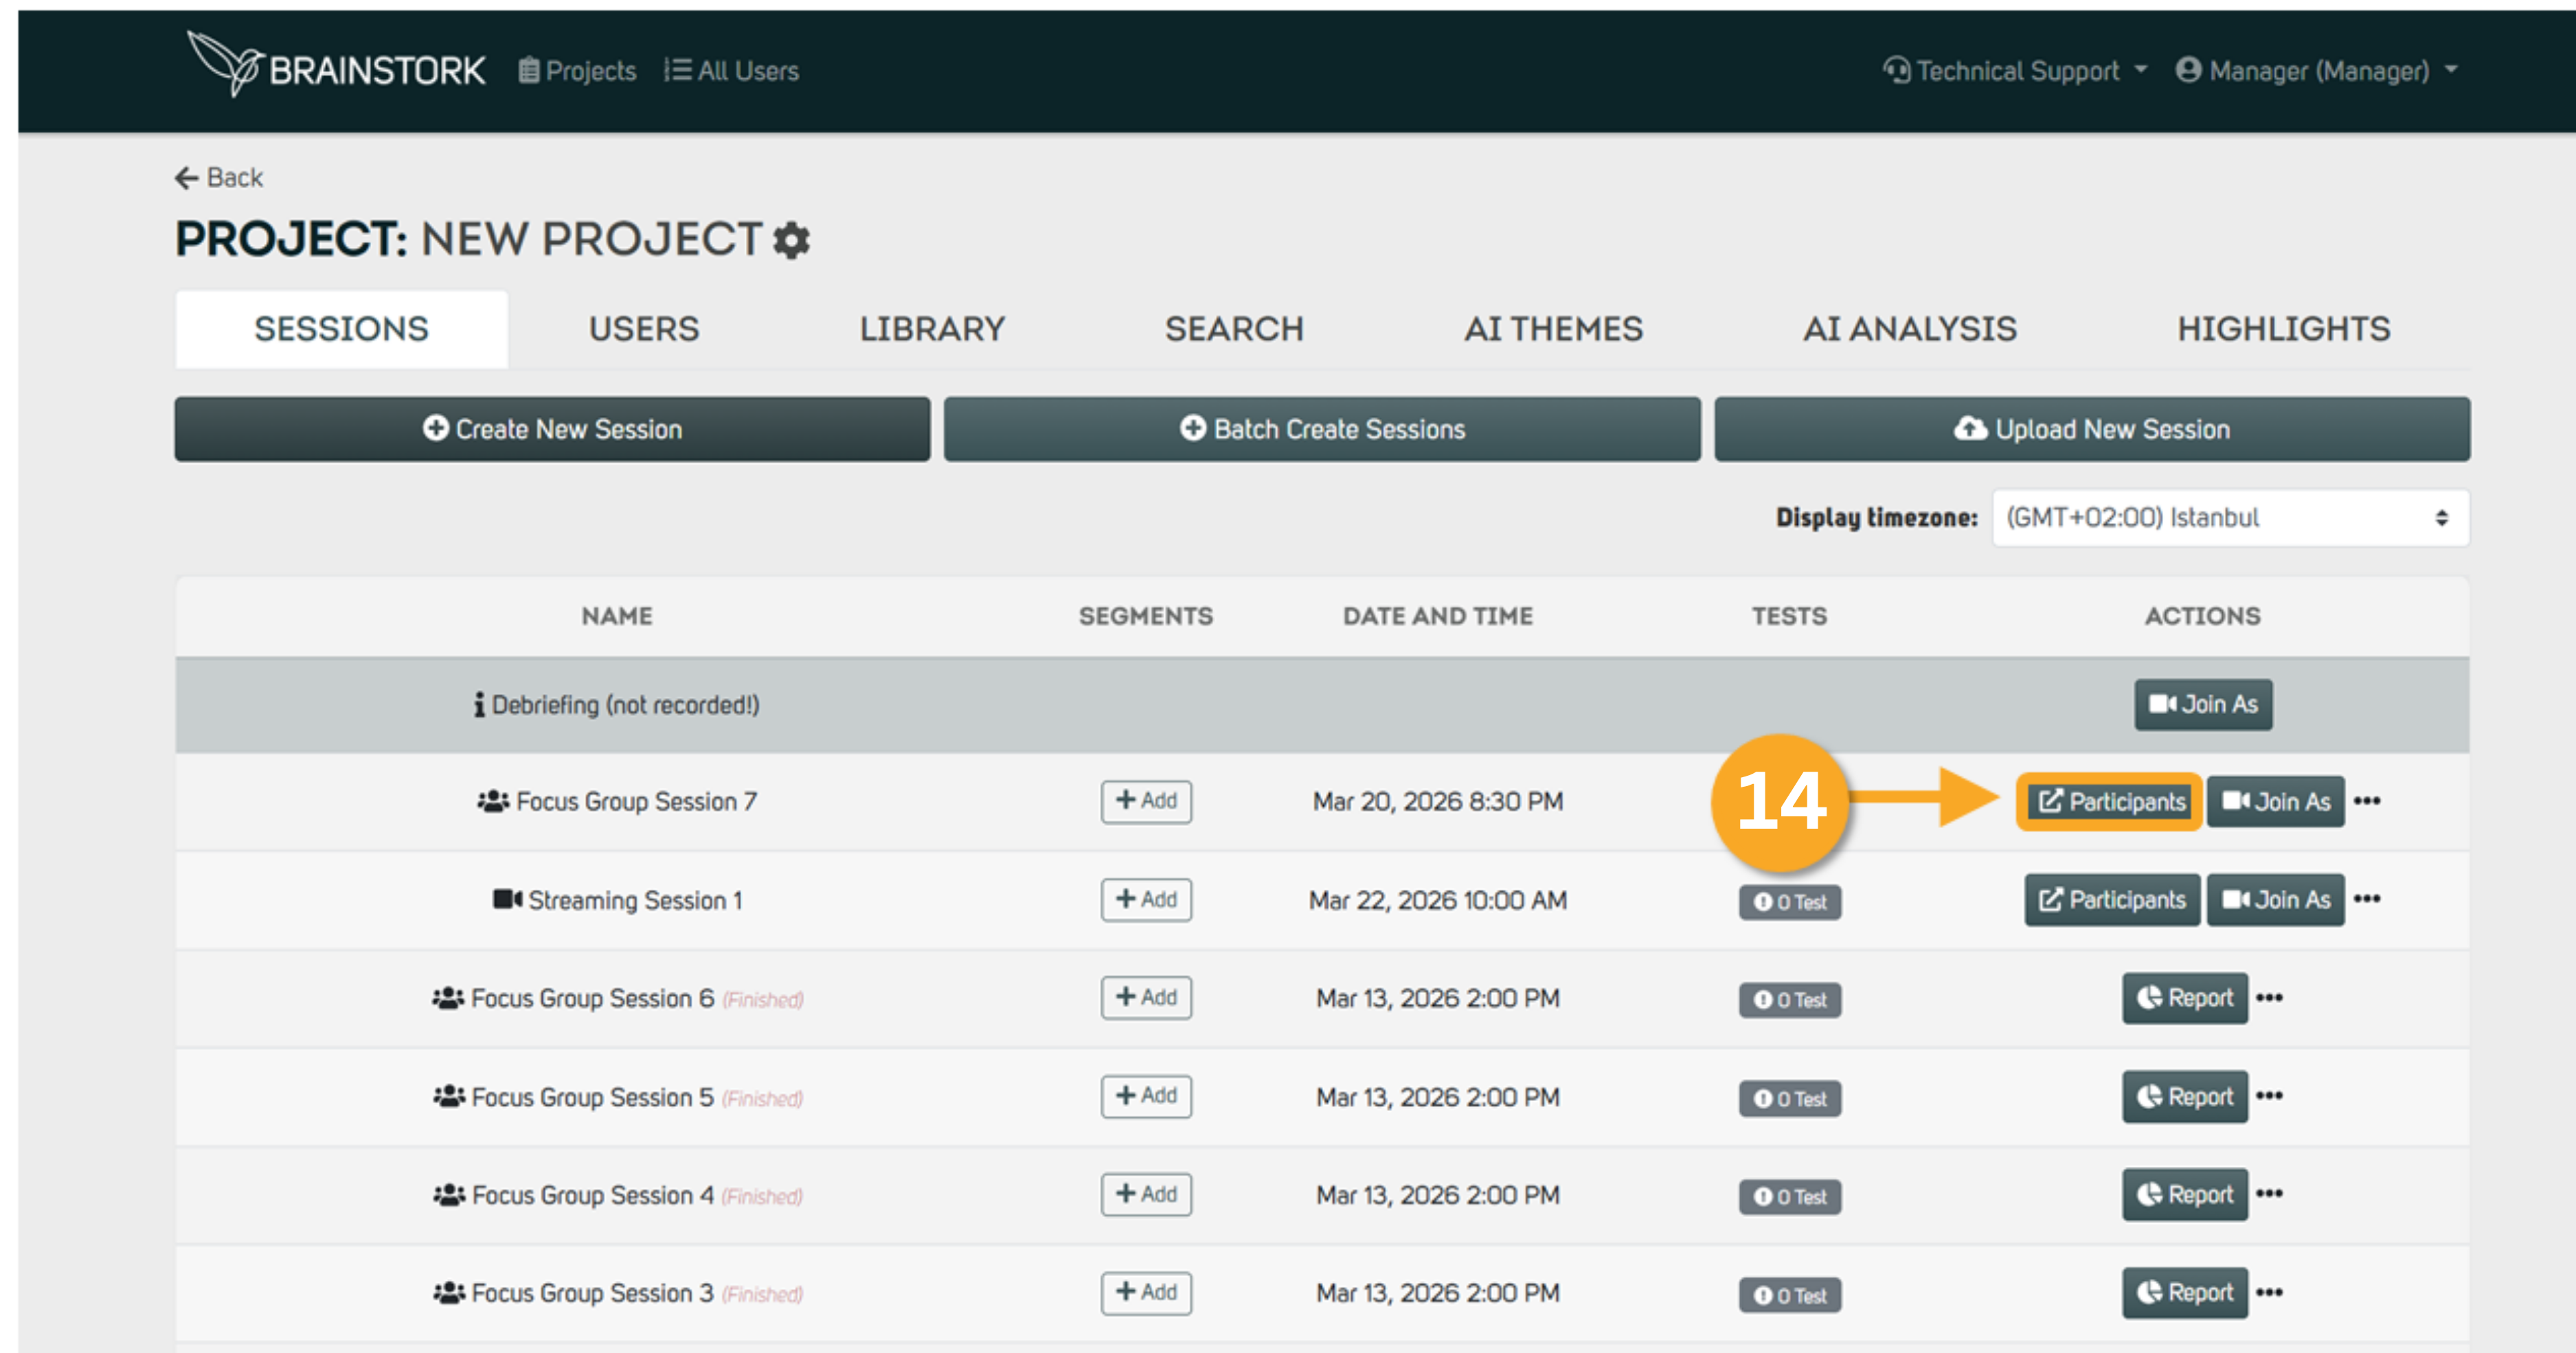
14. Your Brainstork session is created! Click Participants to access your invitation link.
.png)
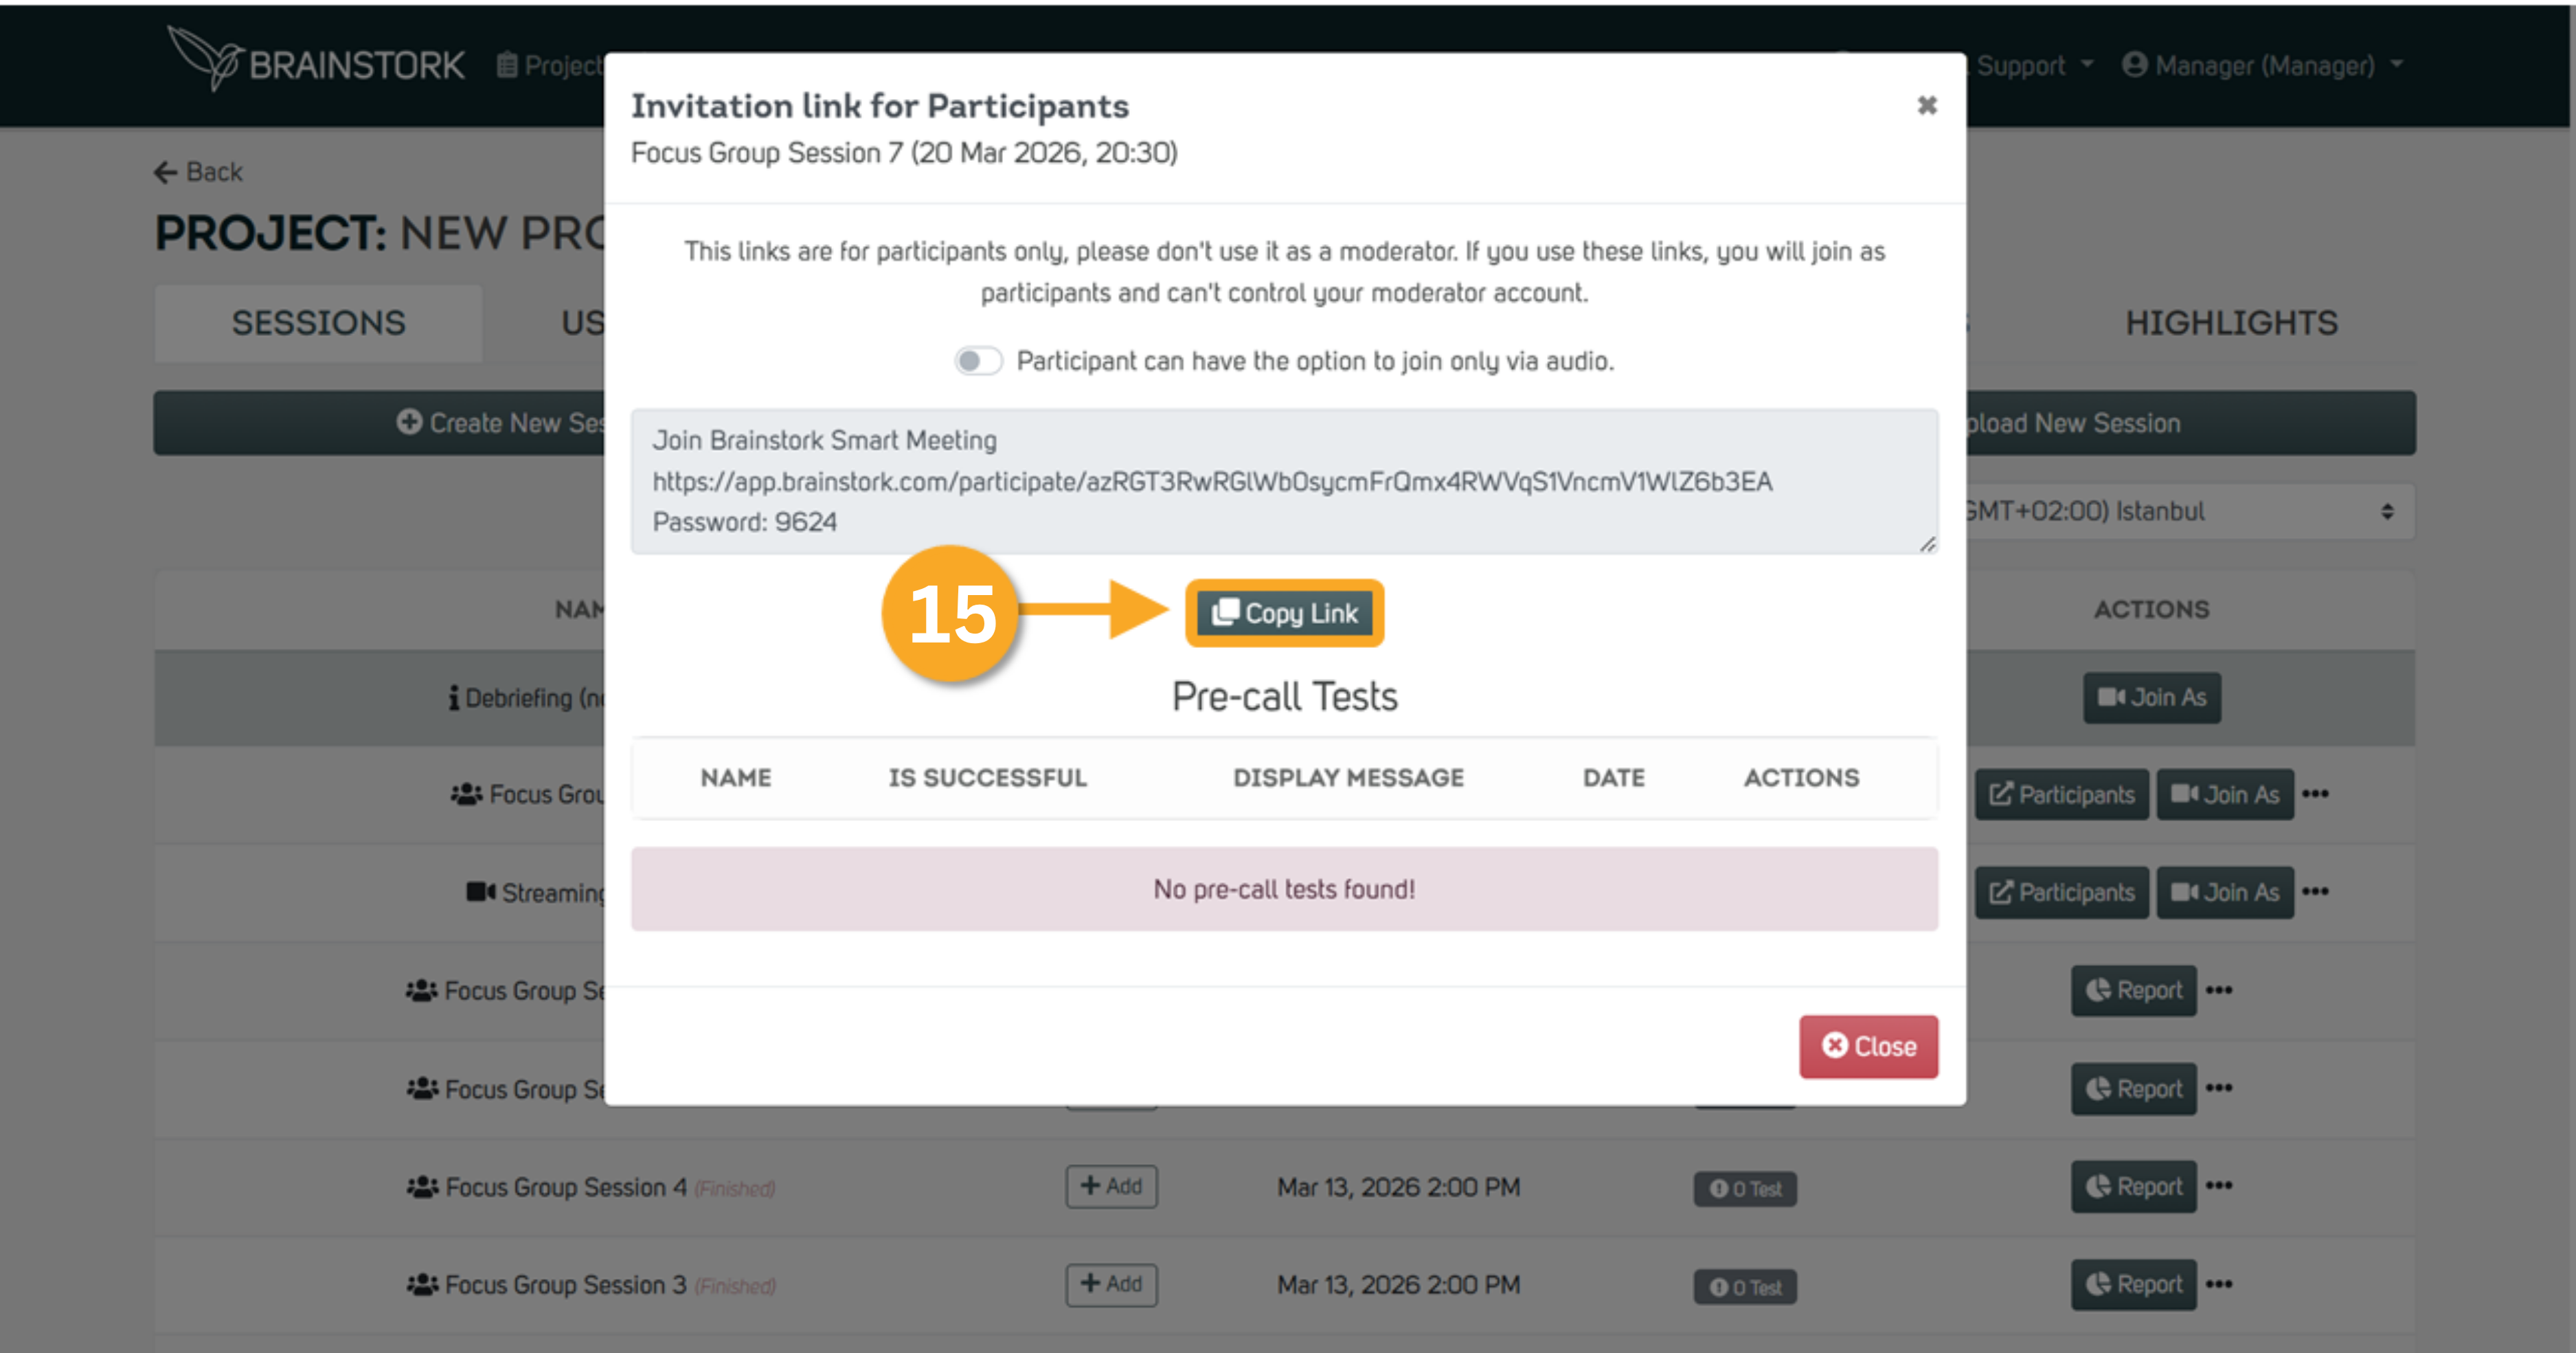
15. Click Copy Link to share the invitation link and password with participants.
.png)
